Example: Generating Videos of an Actor
In this example, we are going to fine-tune WAN 2.2 to be able to generate videos of a specific character or actor. We will be using the actor “Will Smith” in our example to see if we can get the model to generate a high quality video of him eating spaghetti. You’ll see in the image on the left that at the start of the fine-tune WAN has no concept of “Will Smith” the actor, and by the end (image on the right) we have captured his face and expression.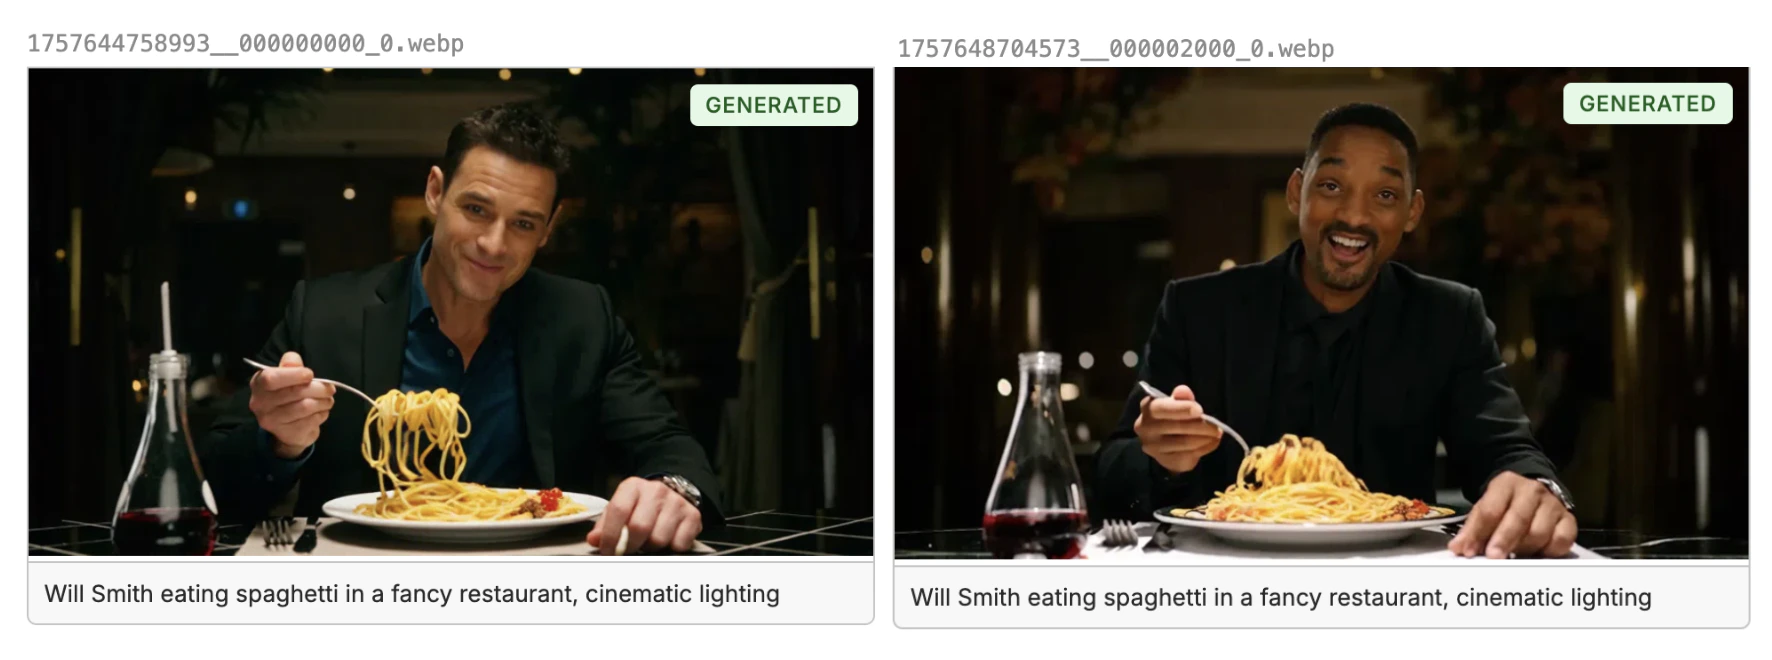
Creating the Training Dataset
When fine-tuning video generation models, you need a dataset that contains the images and descriptions of the images. The model will learn the style and character from the image and describe alone, then can extrapolate to the rest of the video. The expected format is a csv, jsonl or parquet file with a column that contains the relative path to the image in the repository, and a column that contains the description of the image.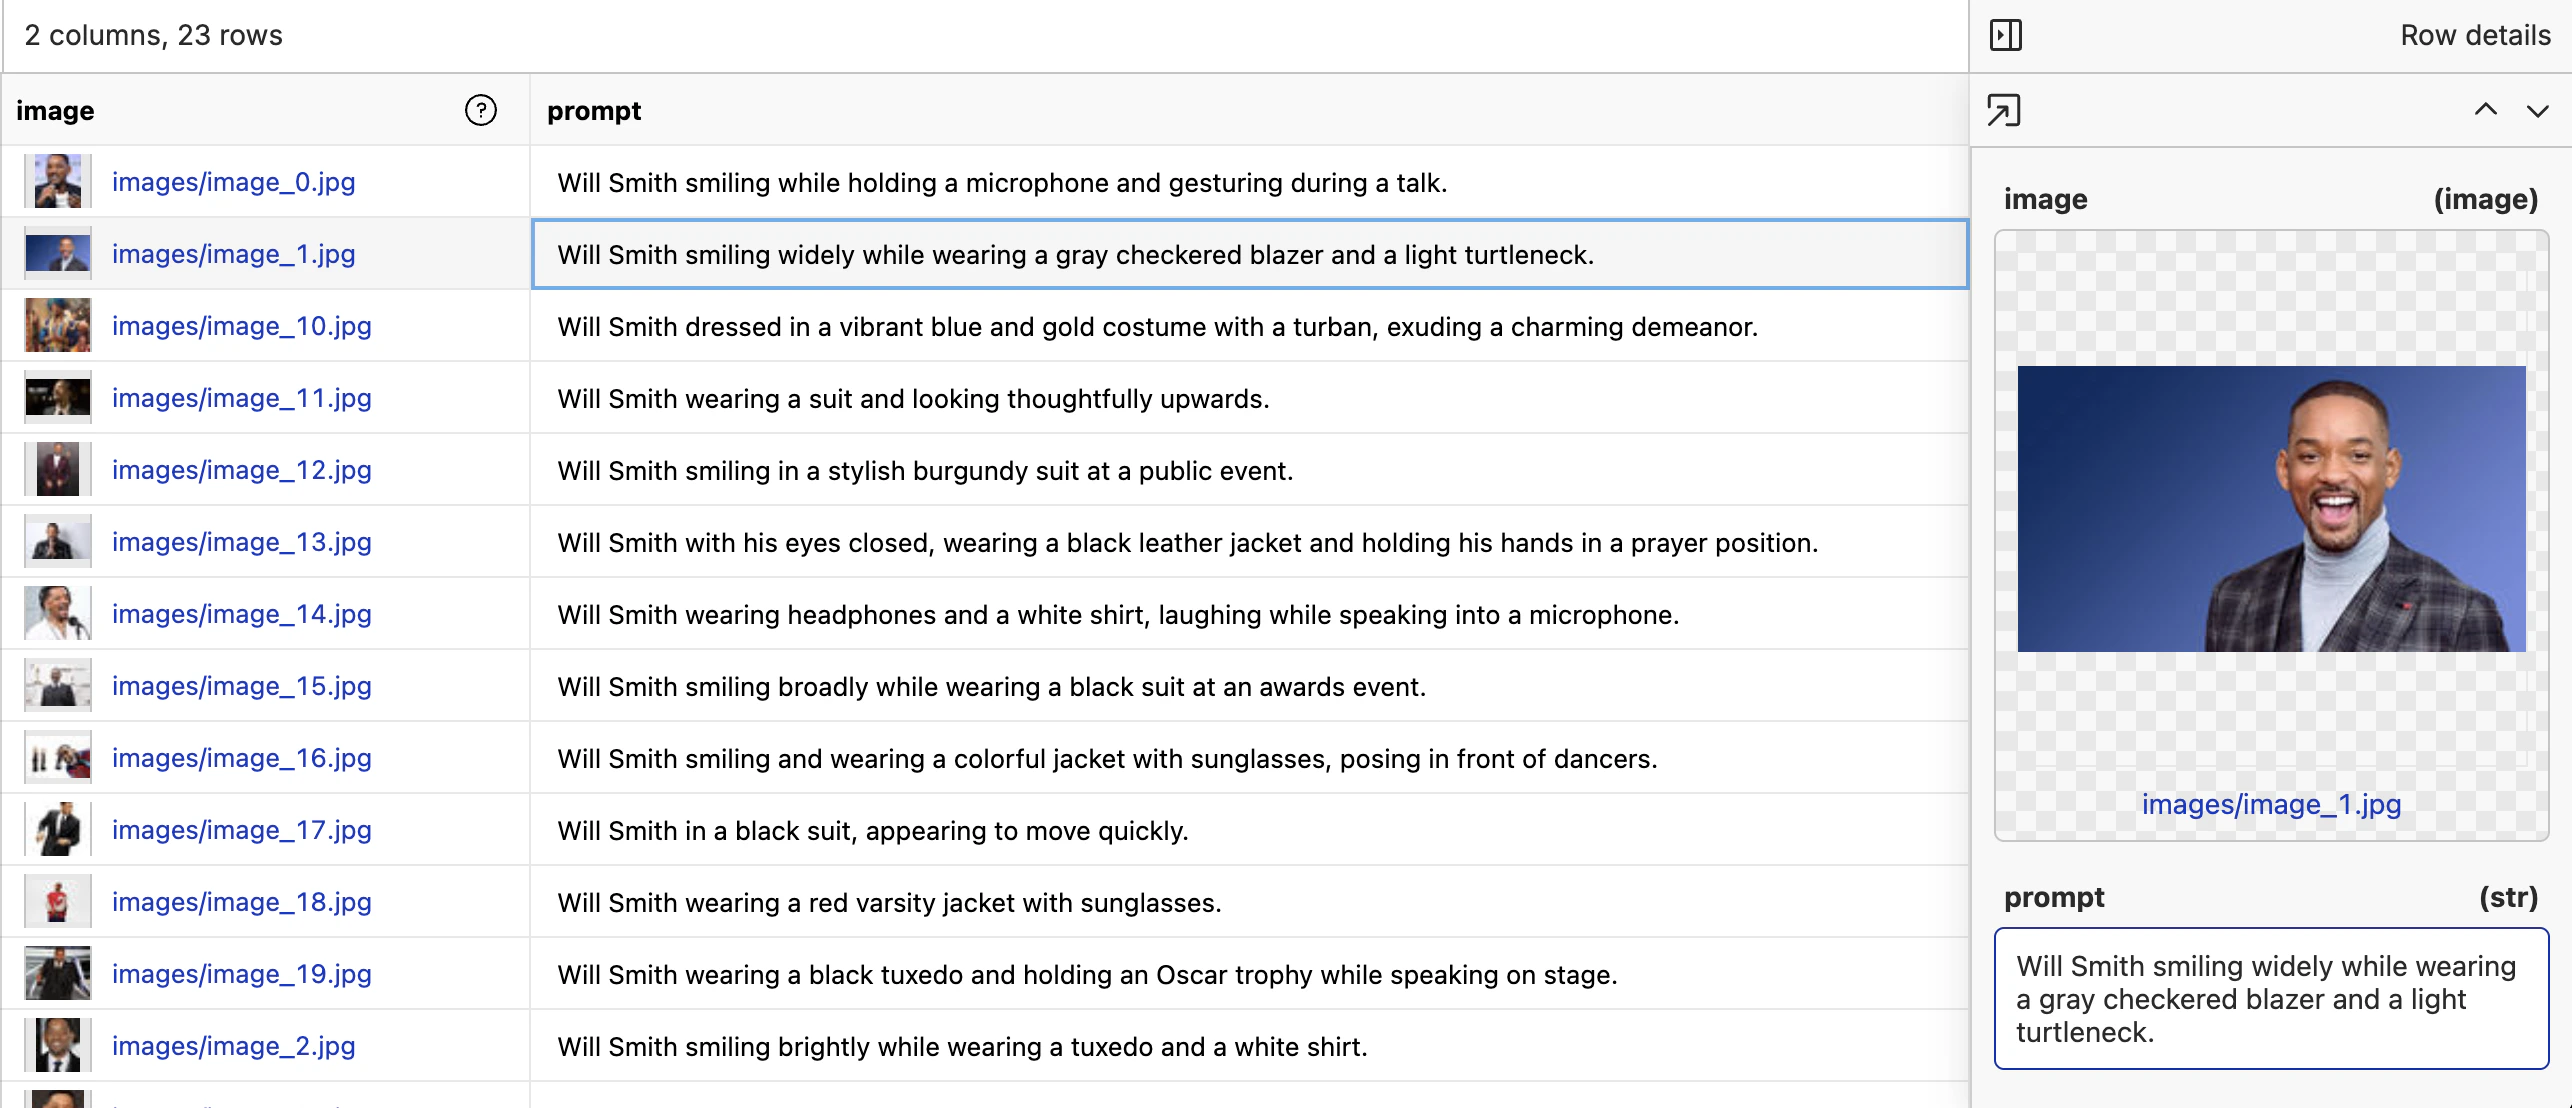
image- the relative path to the image in the oxen repositoryprompt- the description of the image in the row
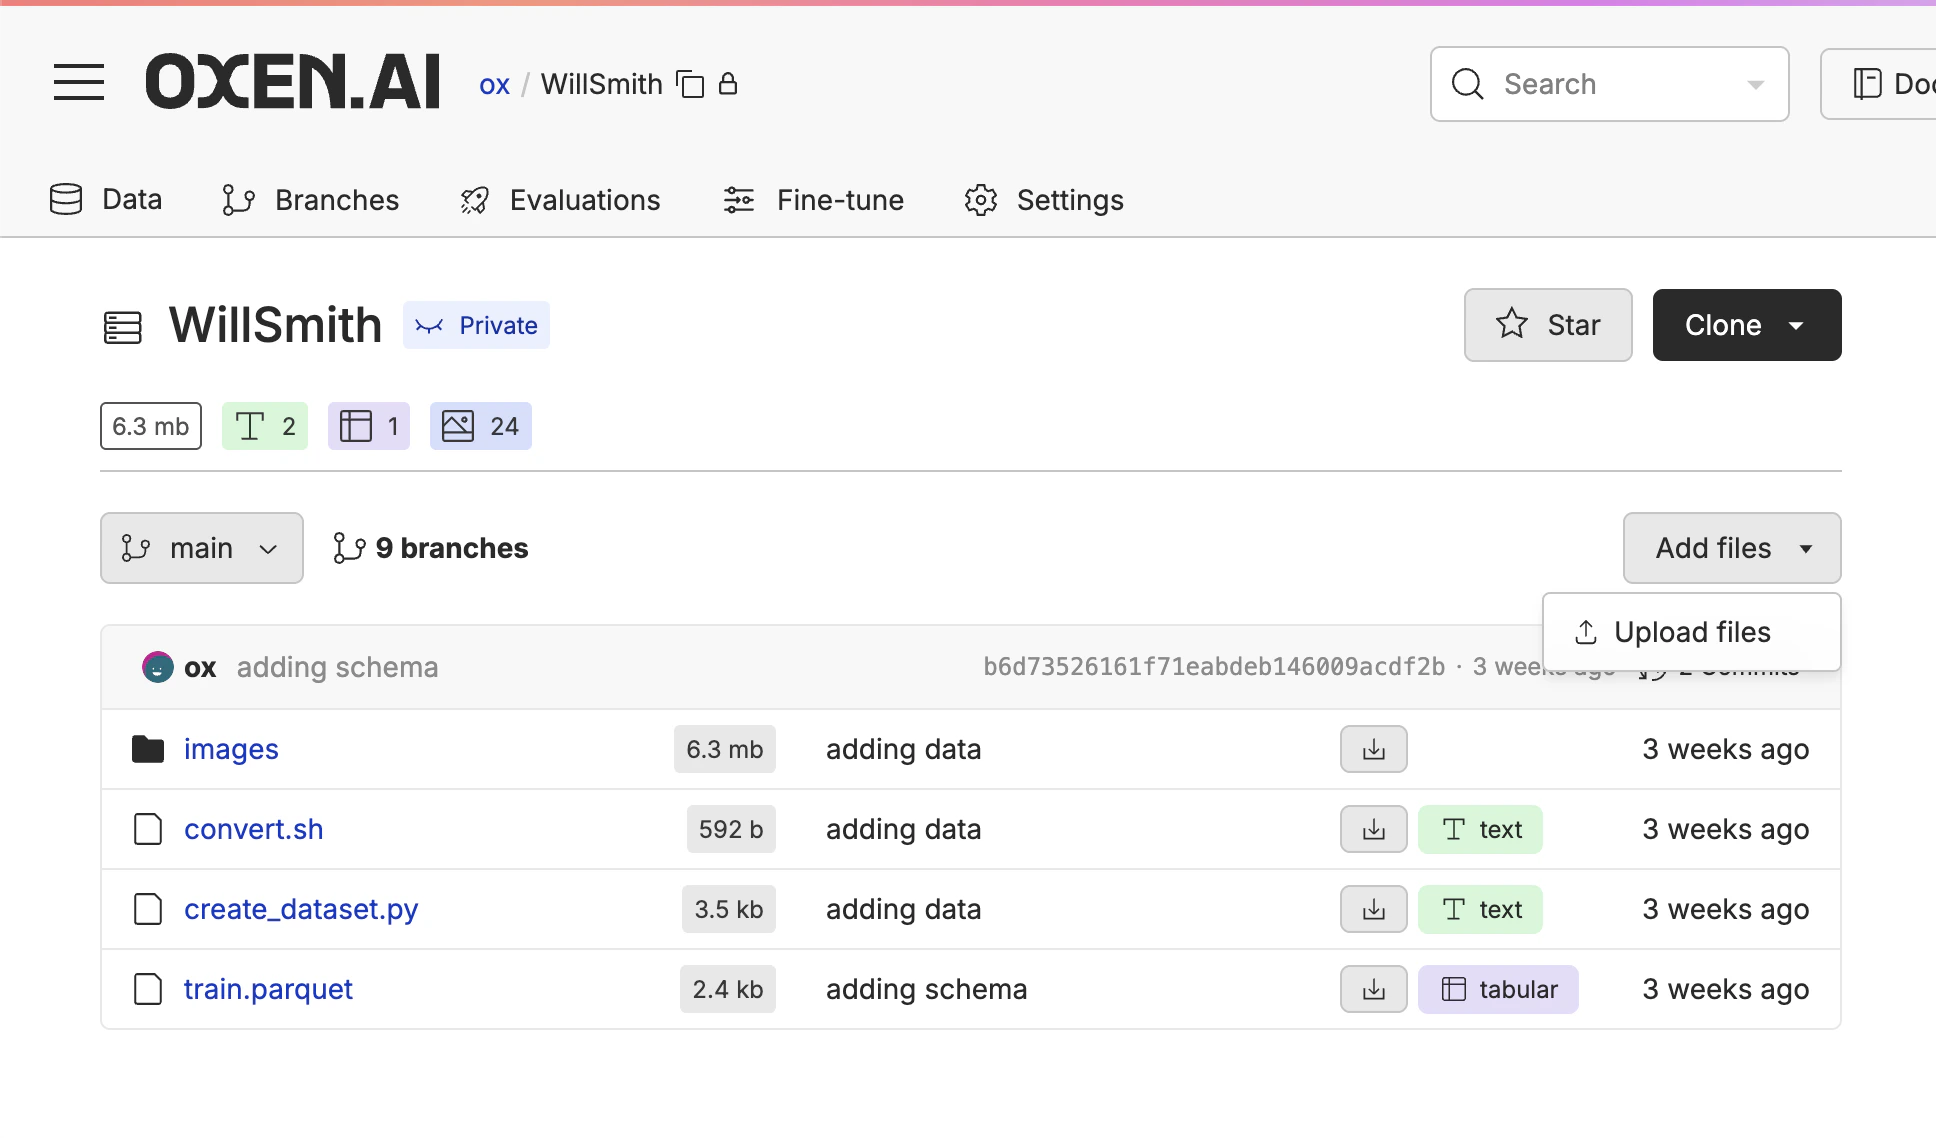
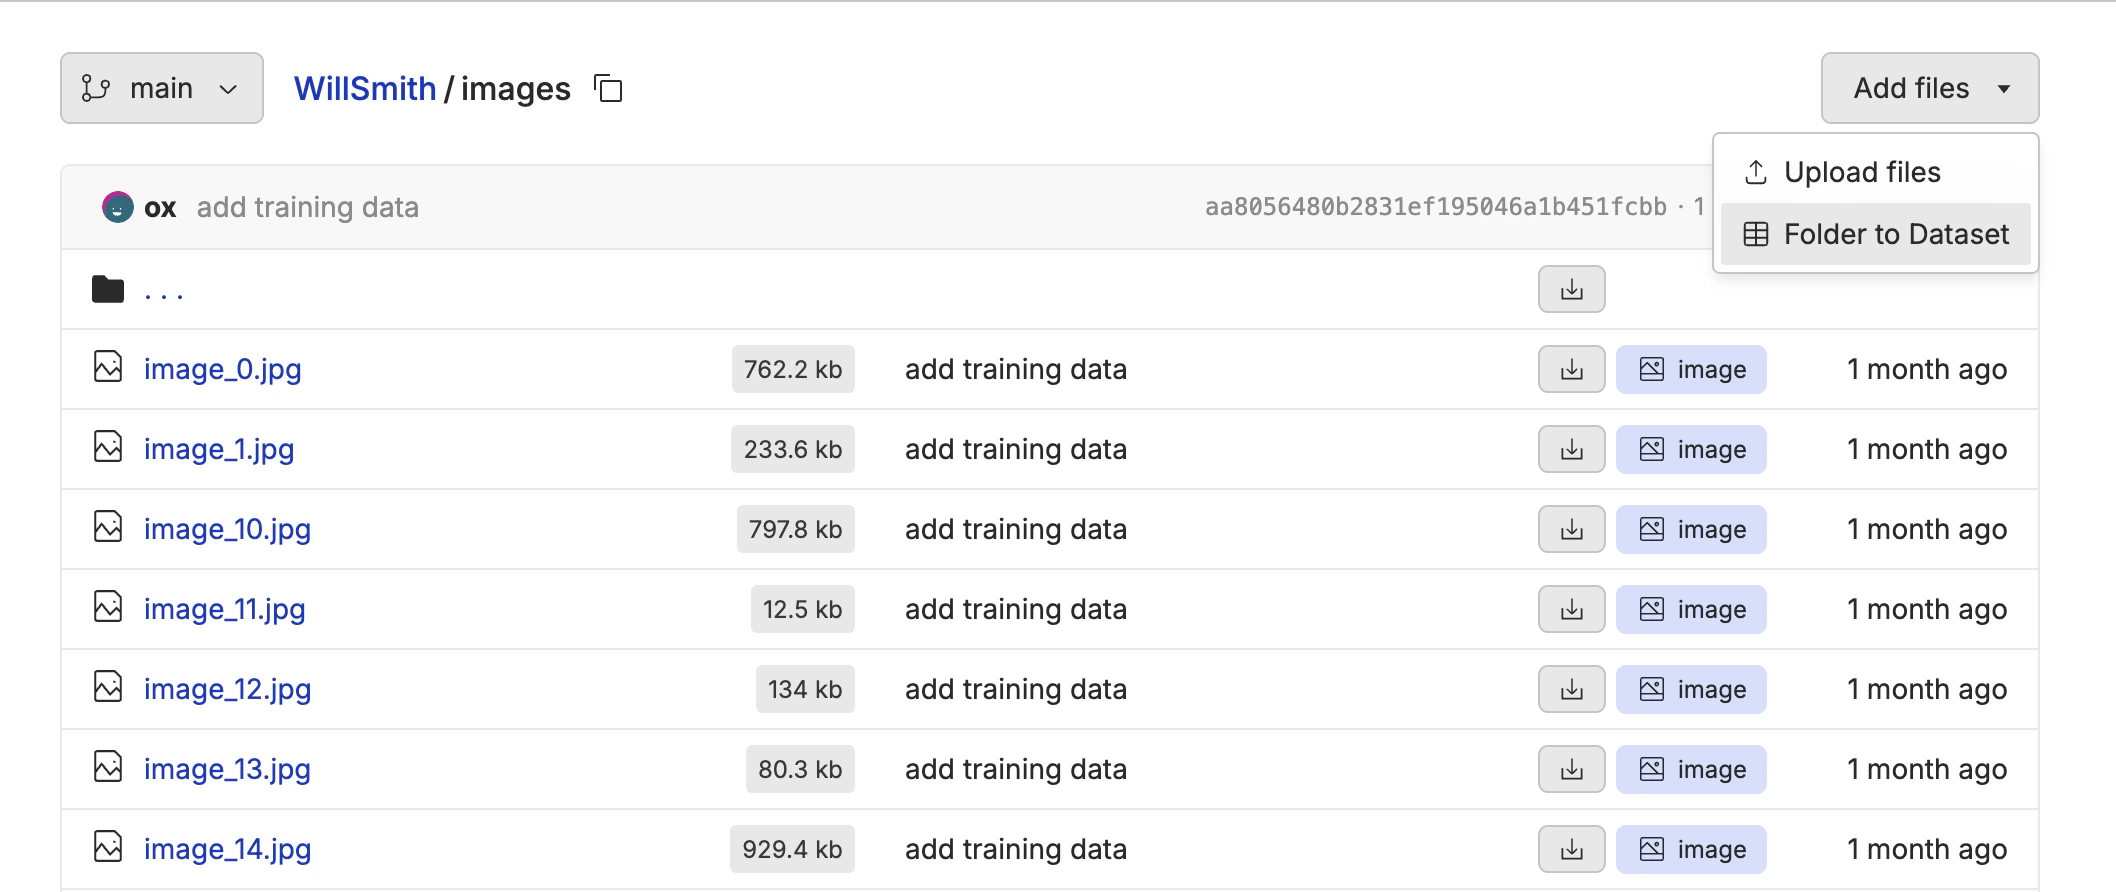
image that contains the relative path to the image.
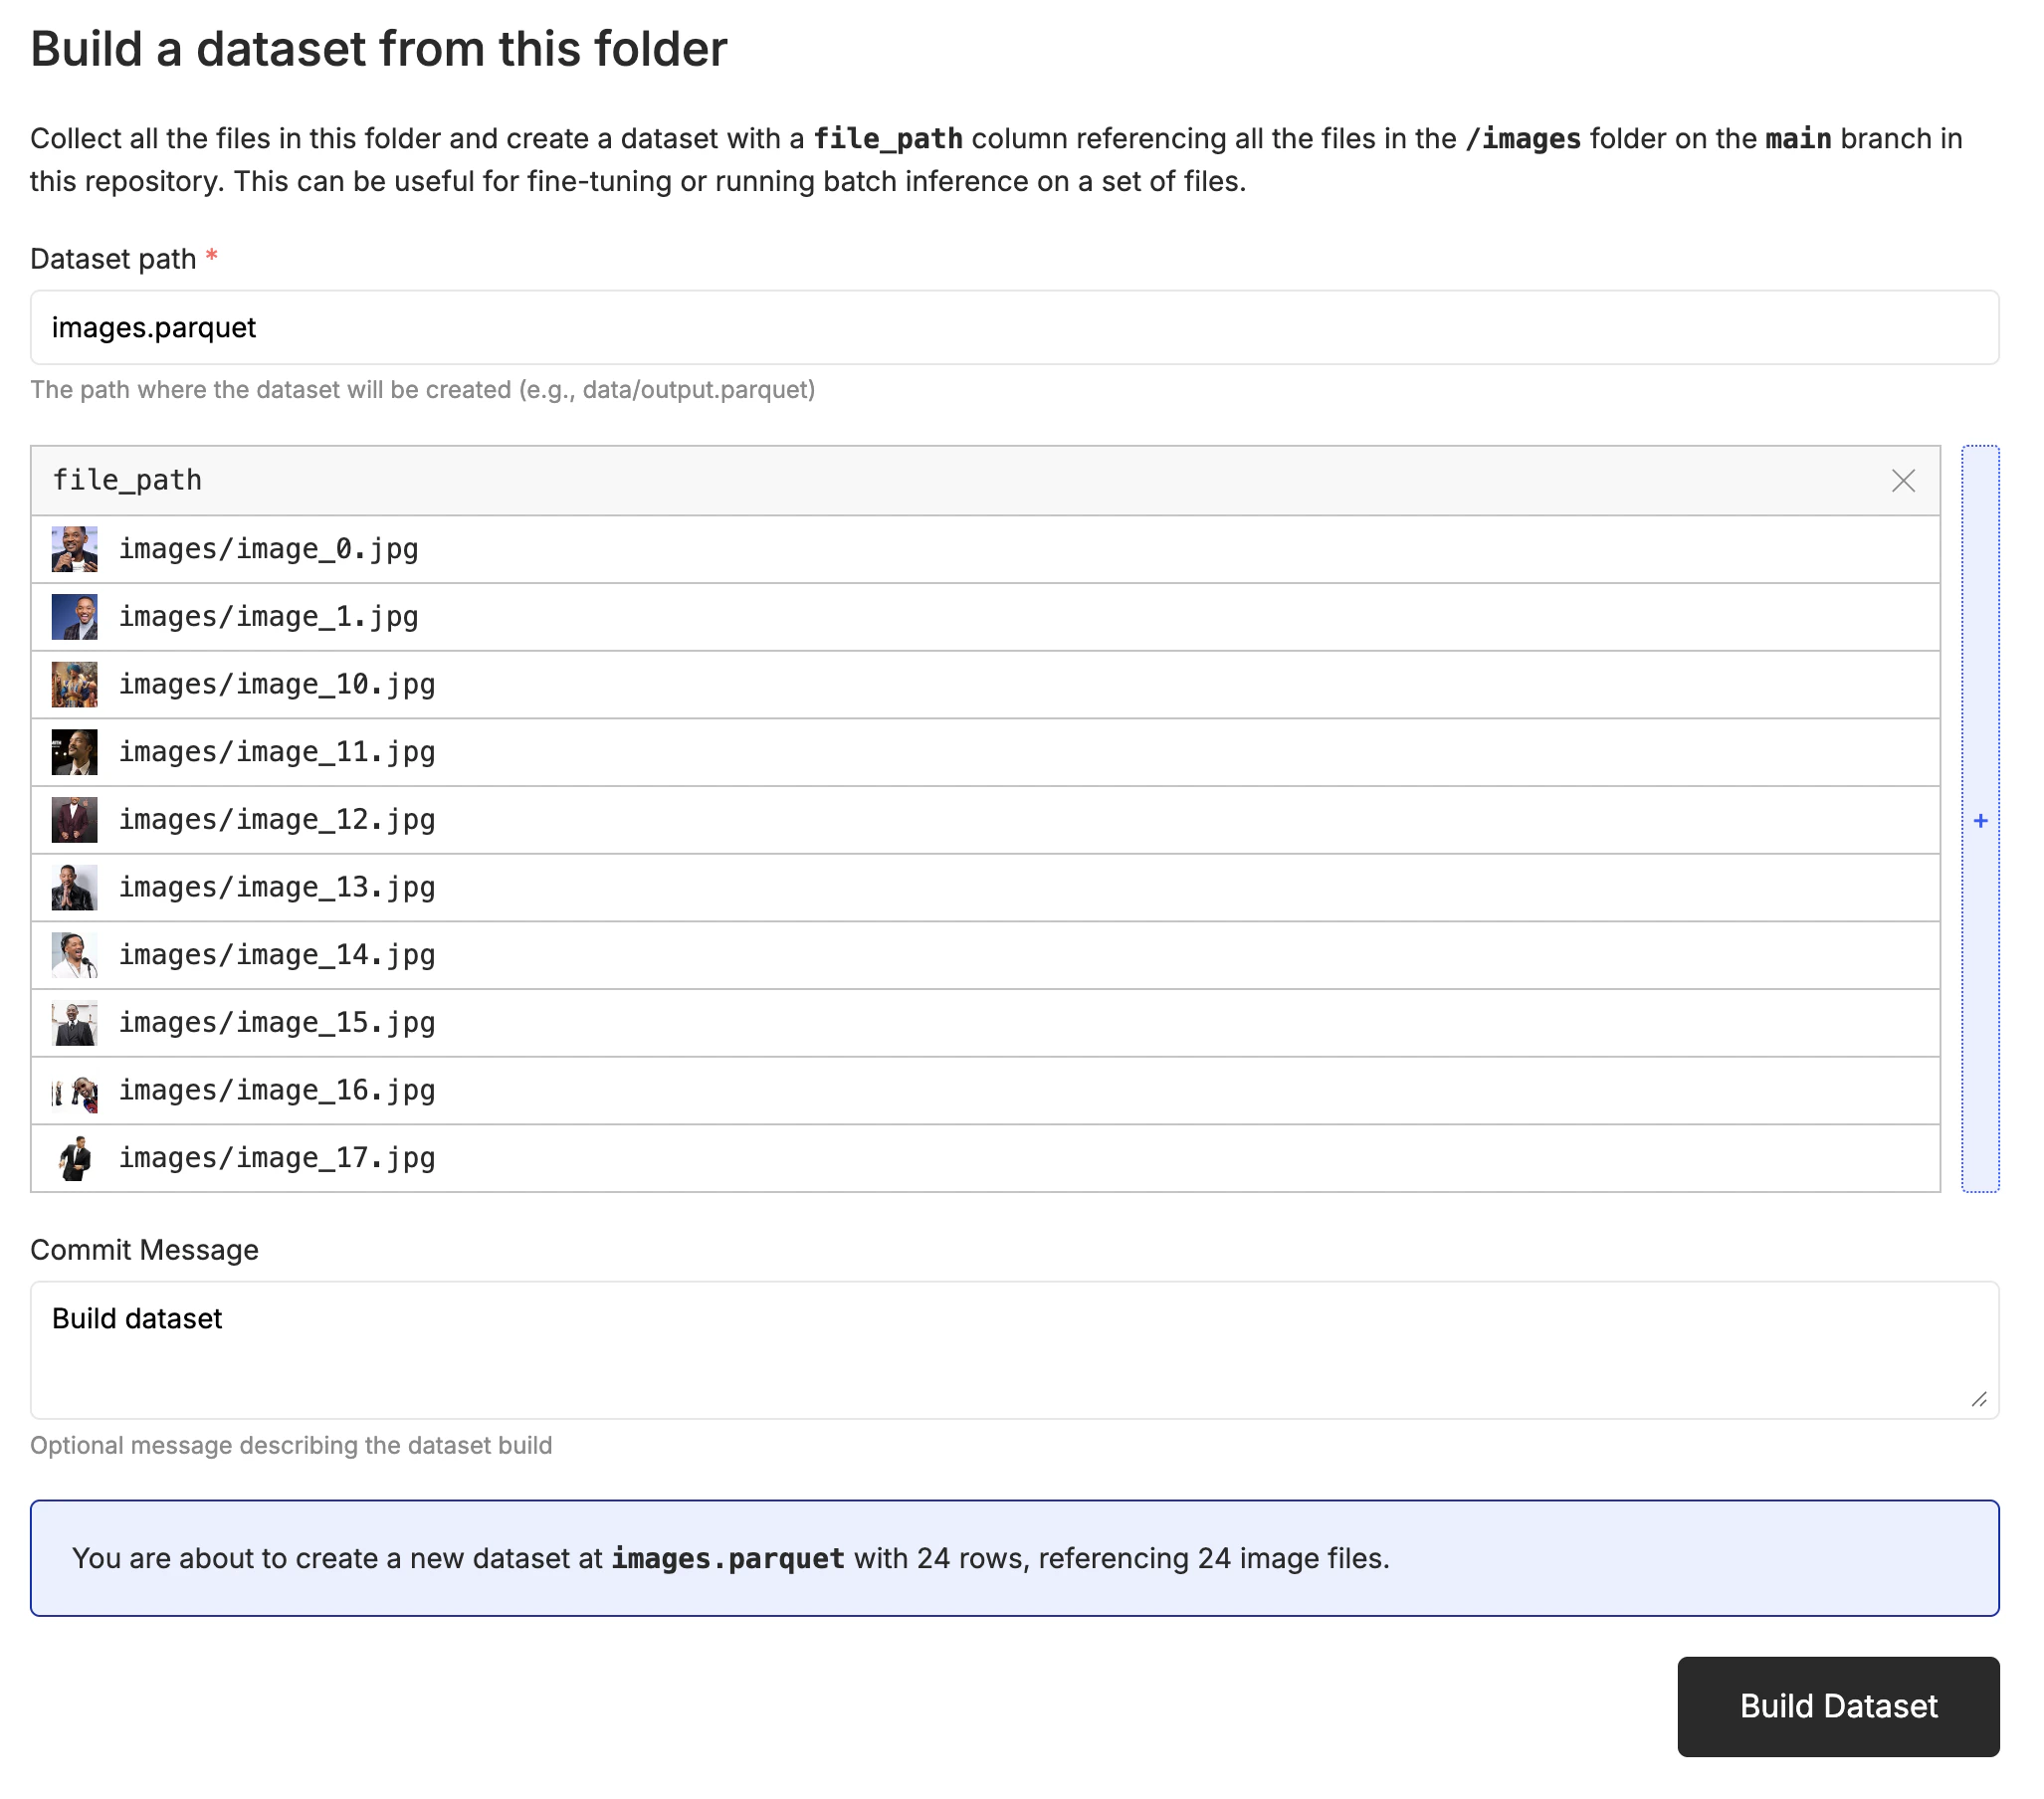
image column. Click the “✏️” edit button above the dataset, then edit the column to enable image rendering. The video below shows the whole process.
Auto-Captioning the Images
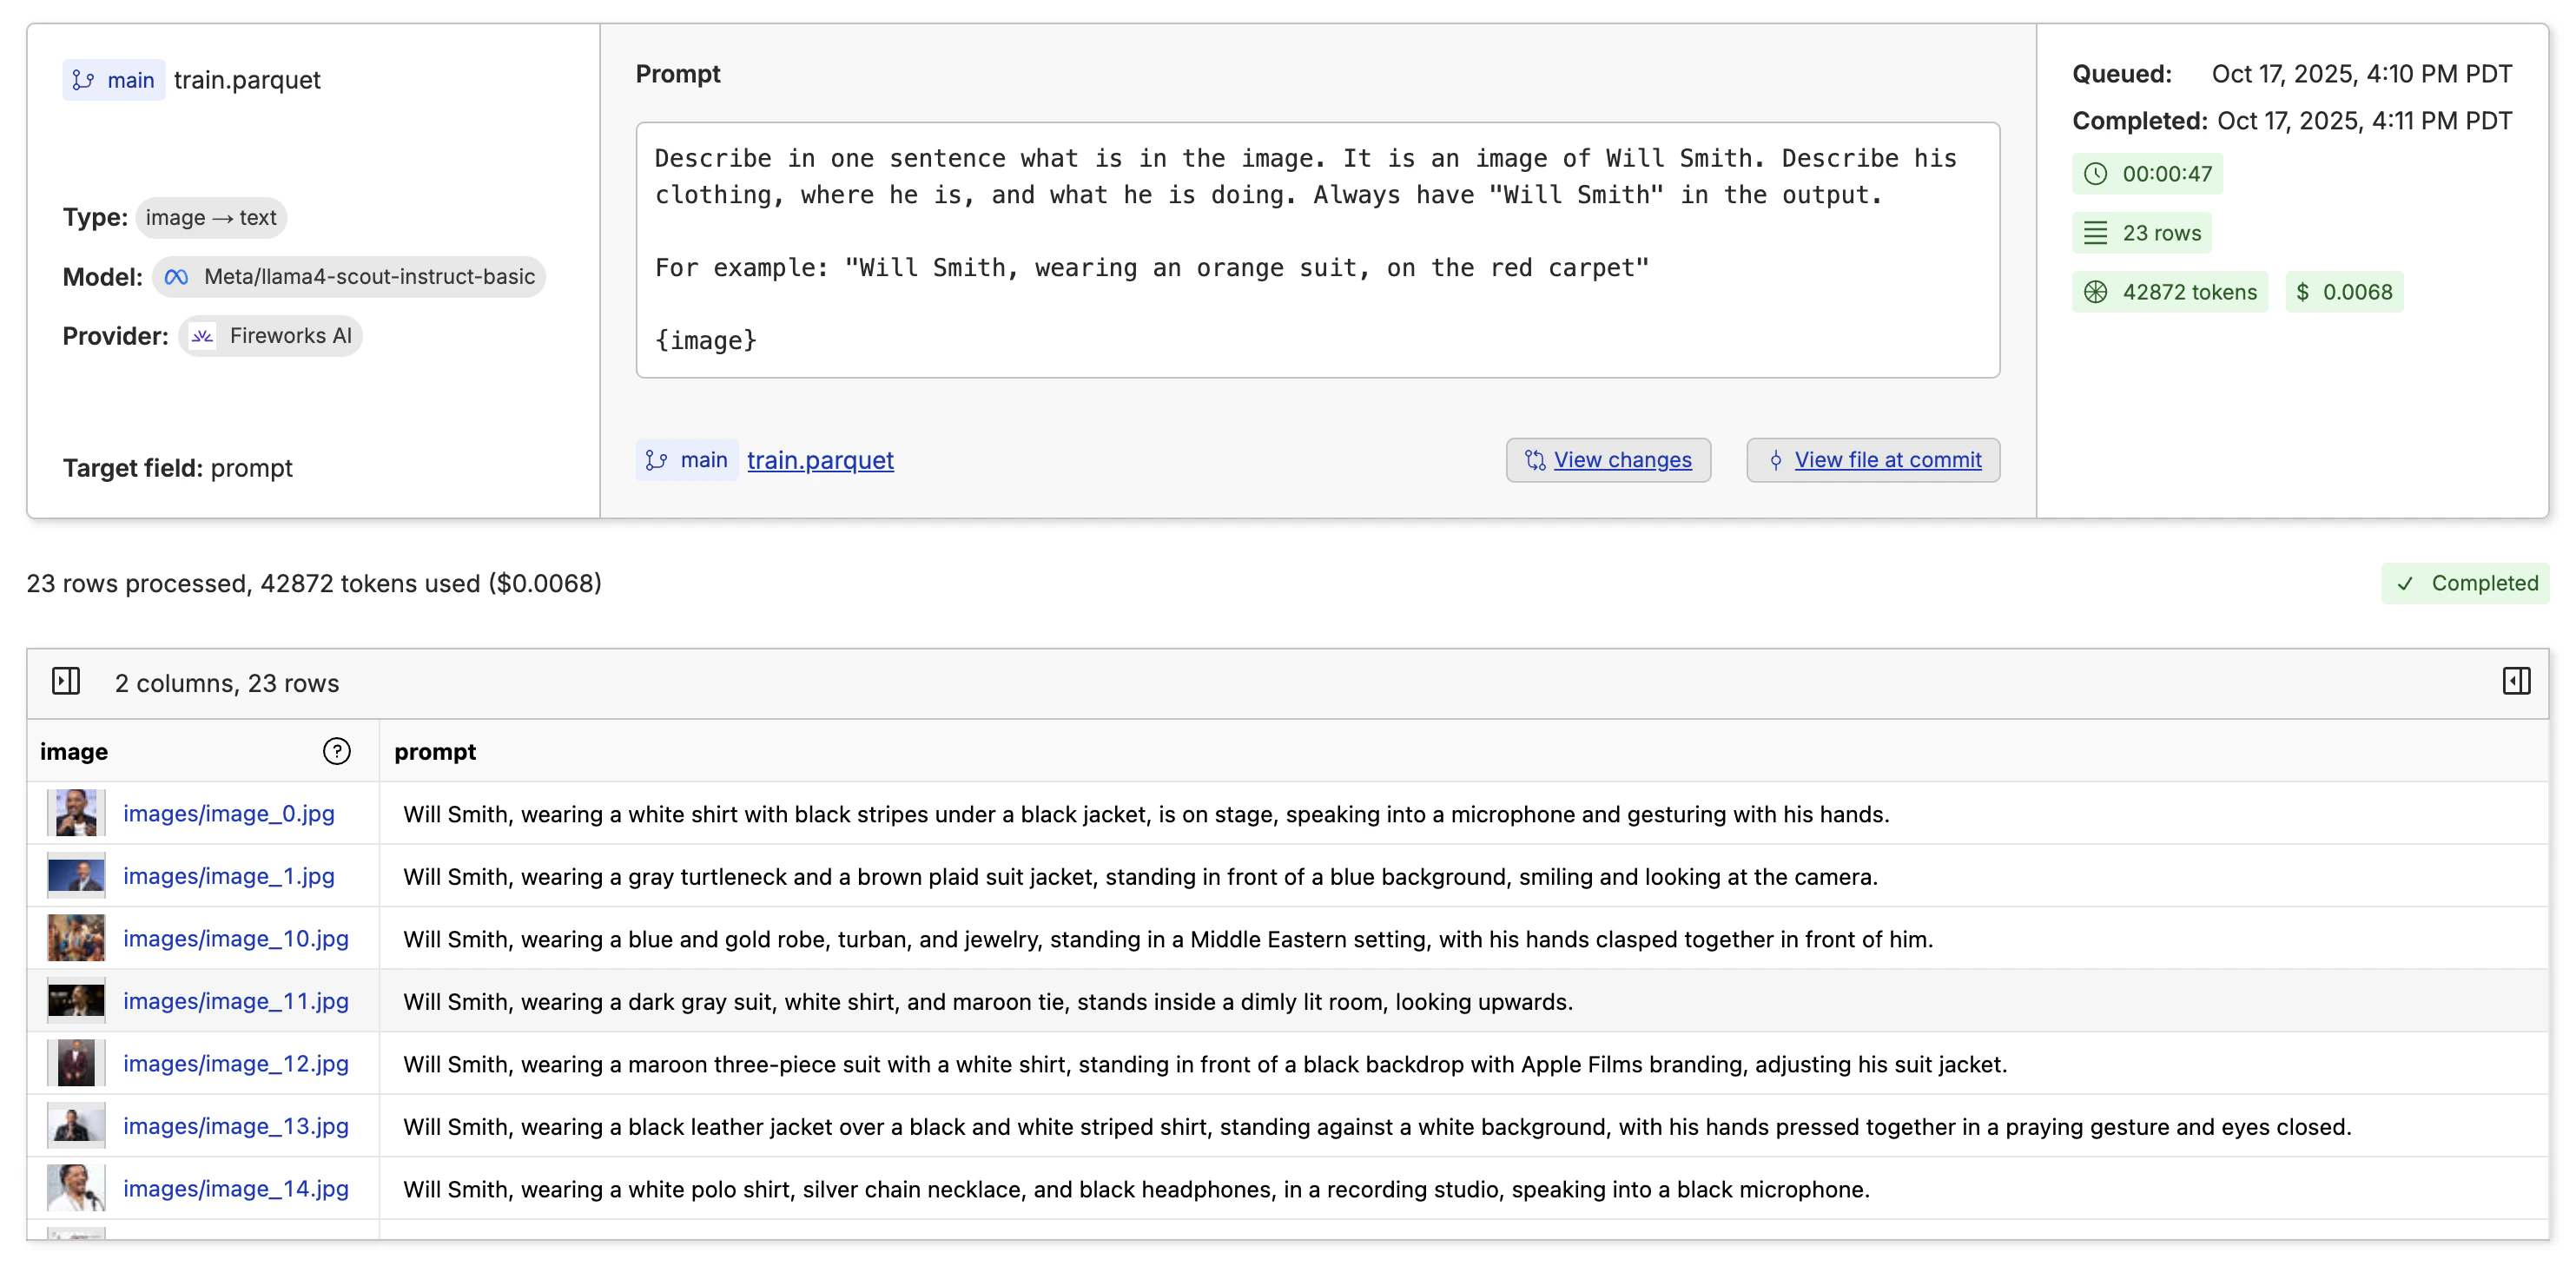
Now that we have a dataset, we need to create a description for each image. We can do this by clicking the “Actions” button and selecting “Run Inference”.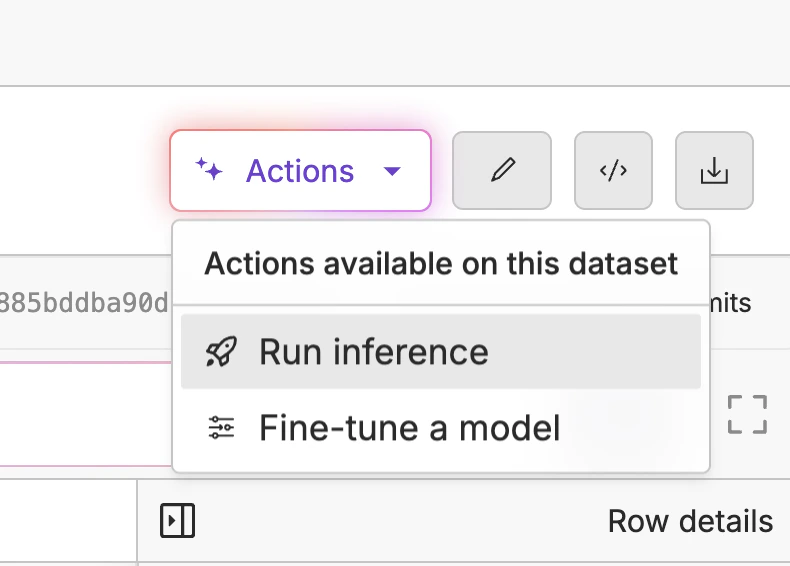
image -> text from the dropdown on the left. Then write a prompt that describes what you want in the caption and any formatting you want to apply.
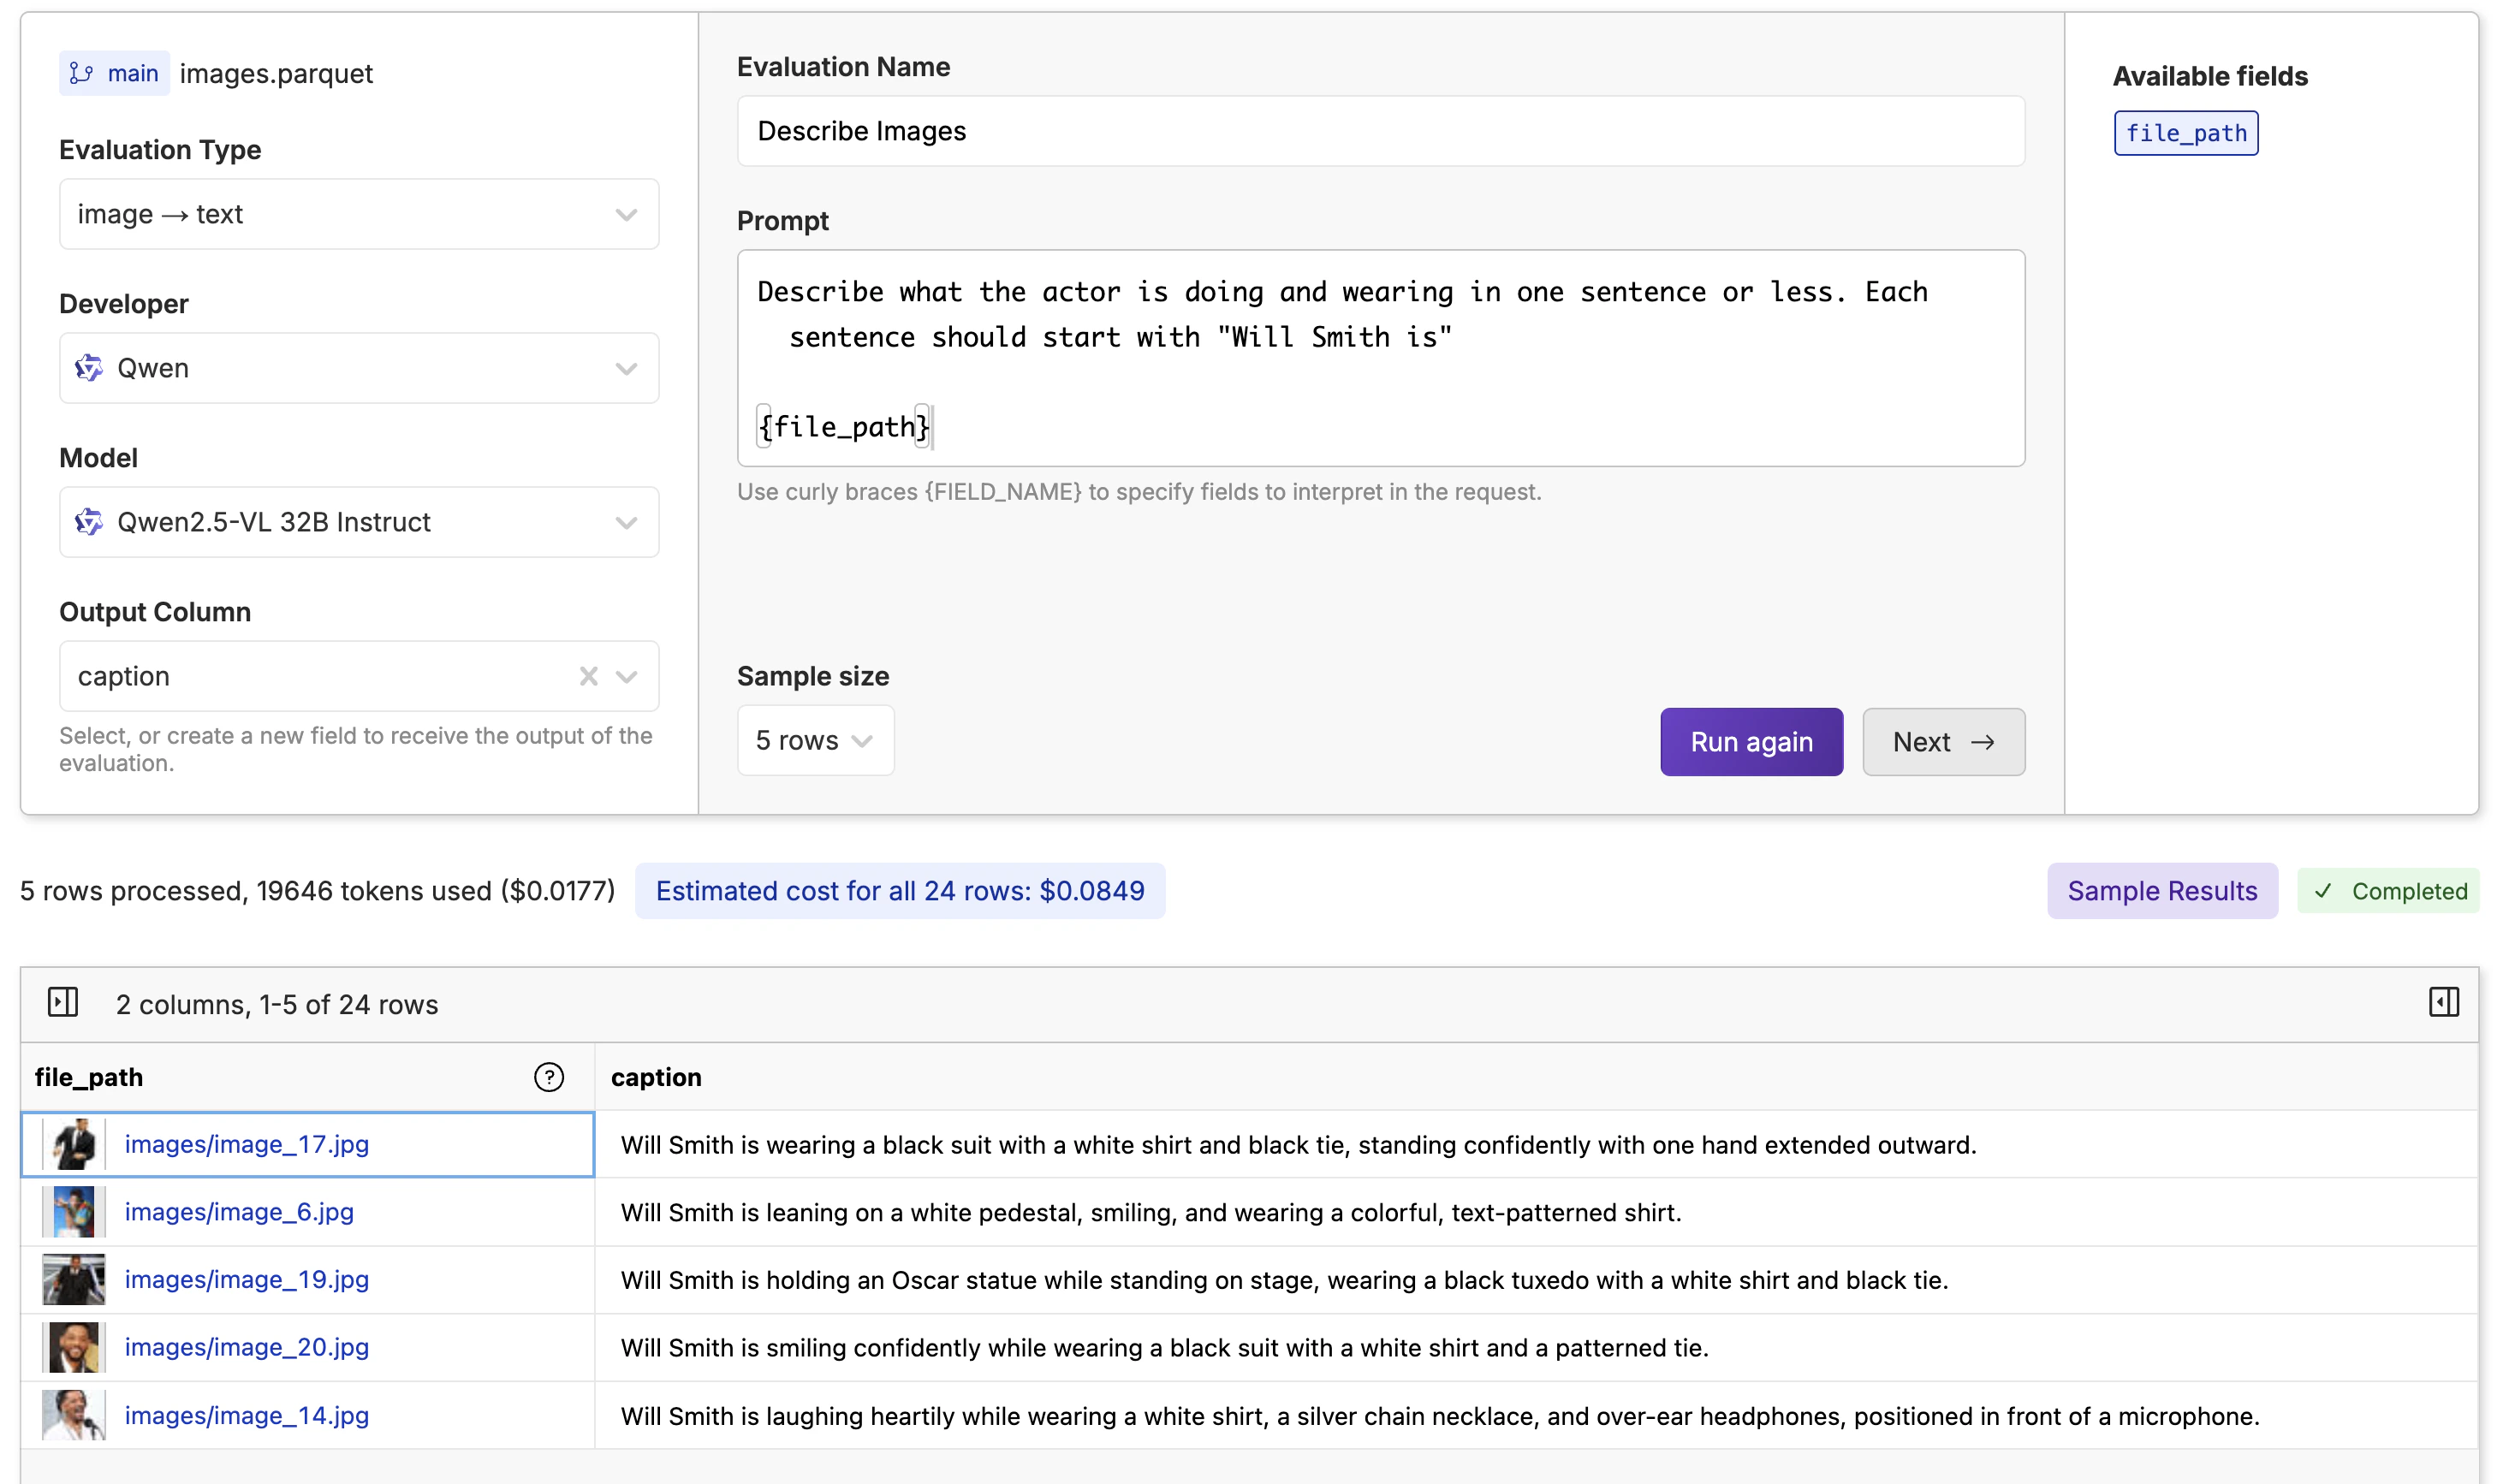
Note: You must supply the curly braces
{} around the file_path column in the prompt to know what column to use for the image.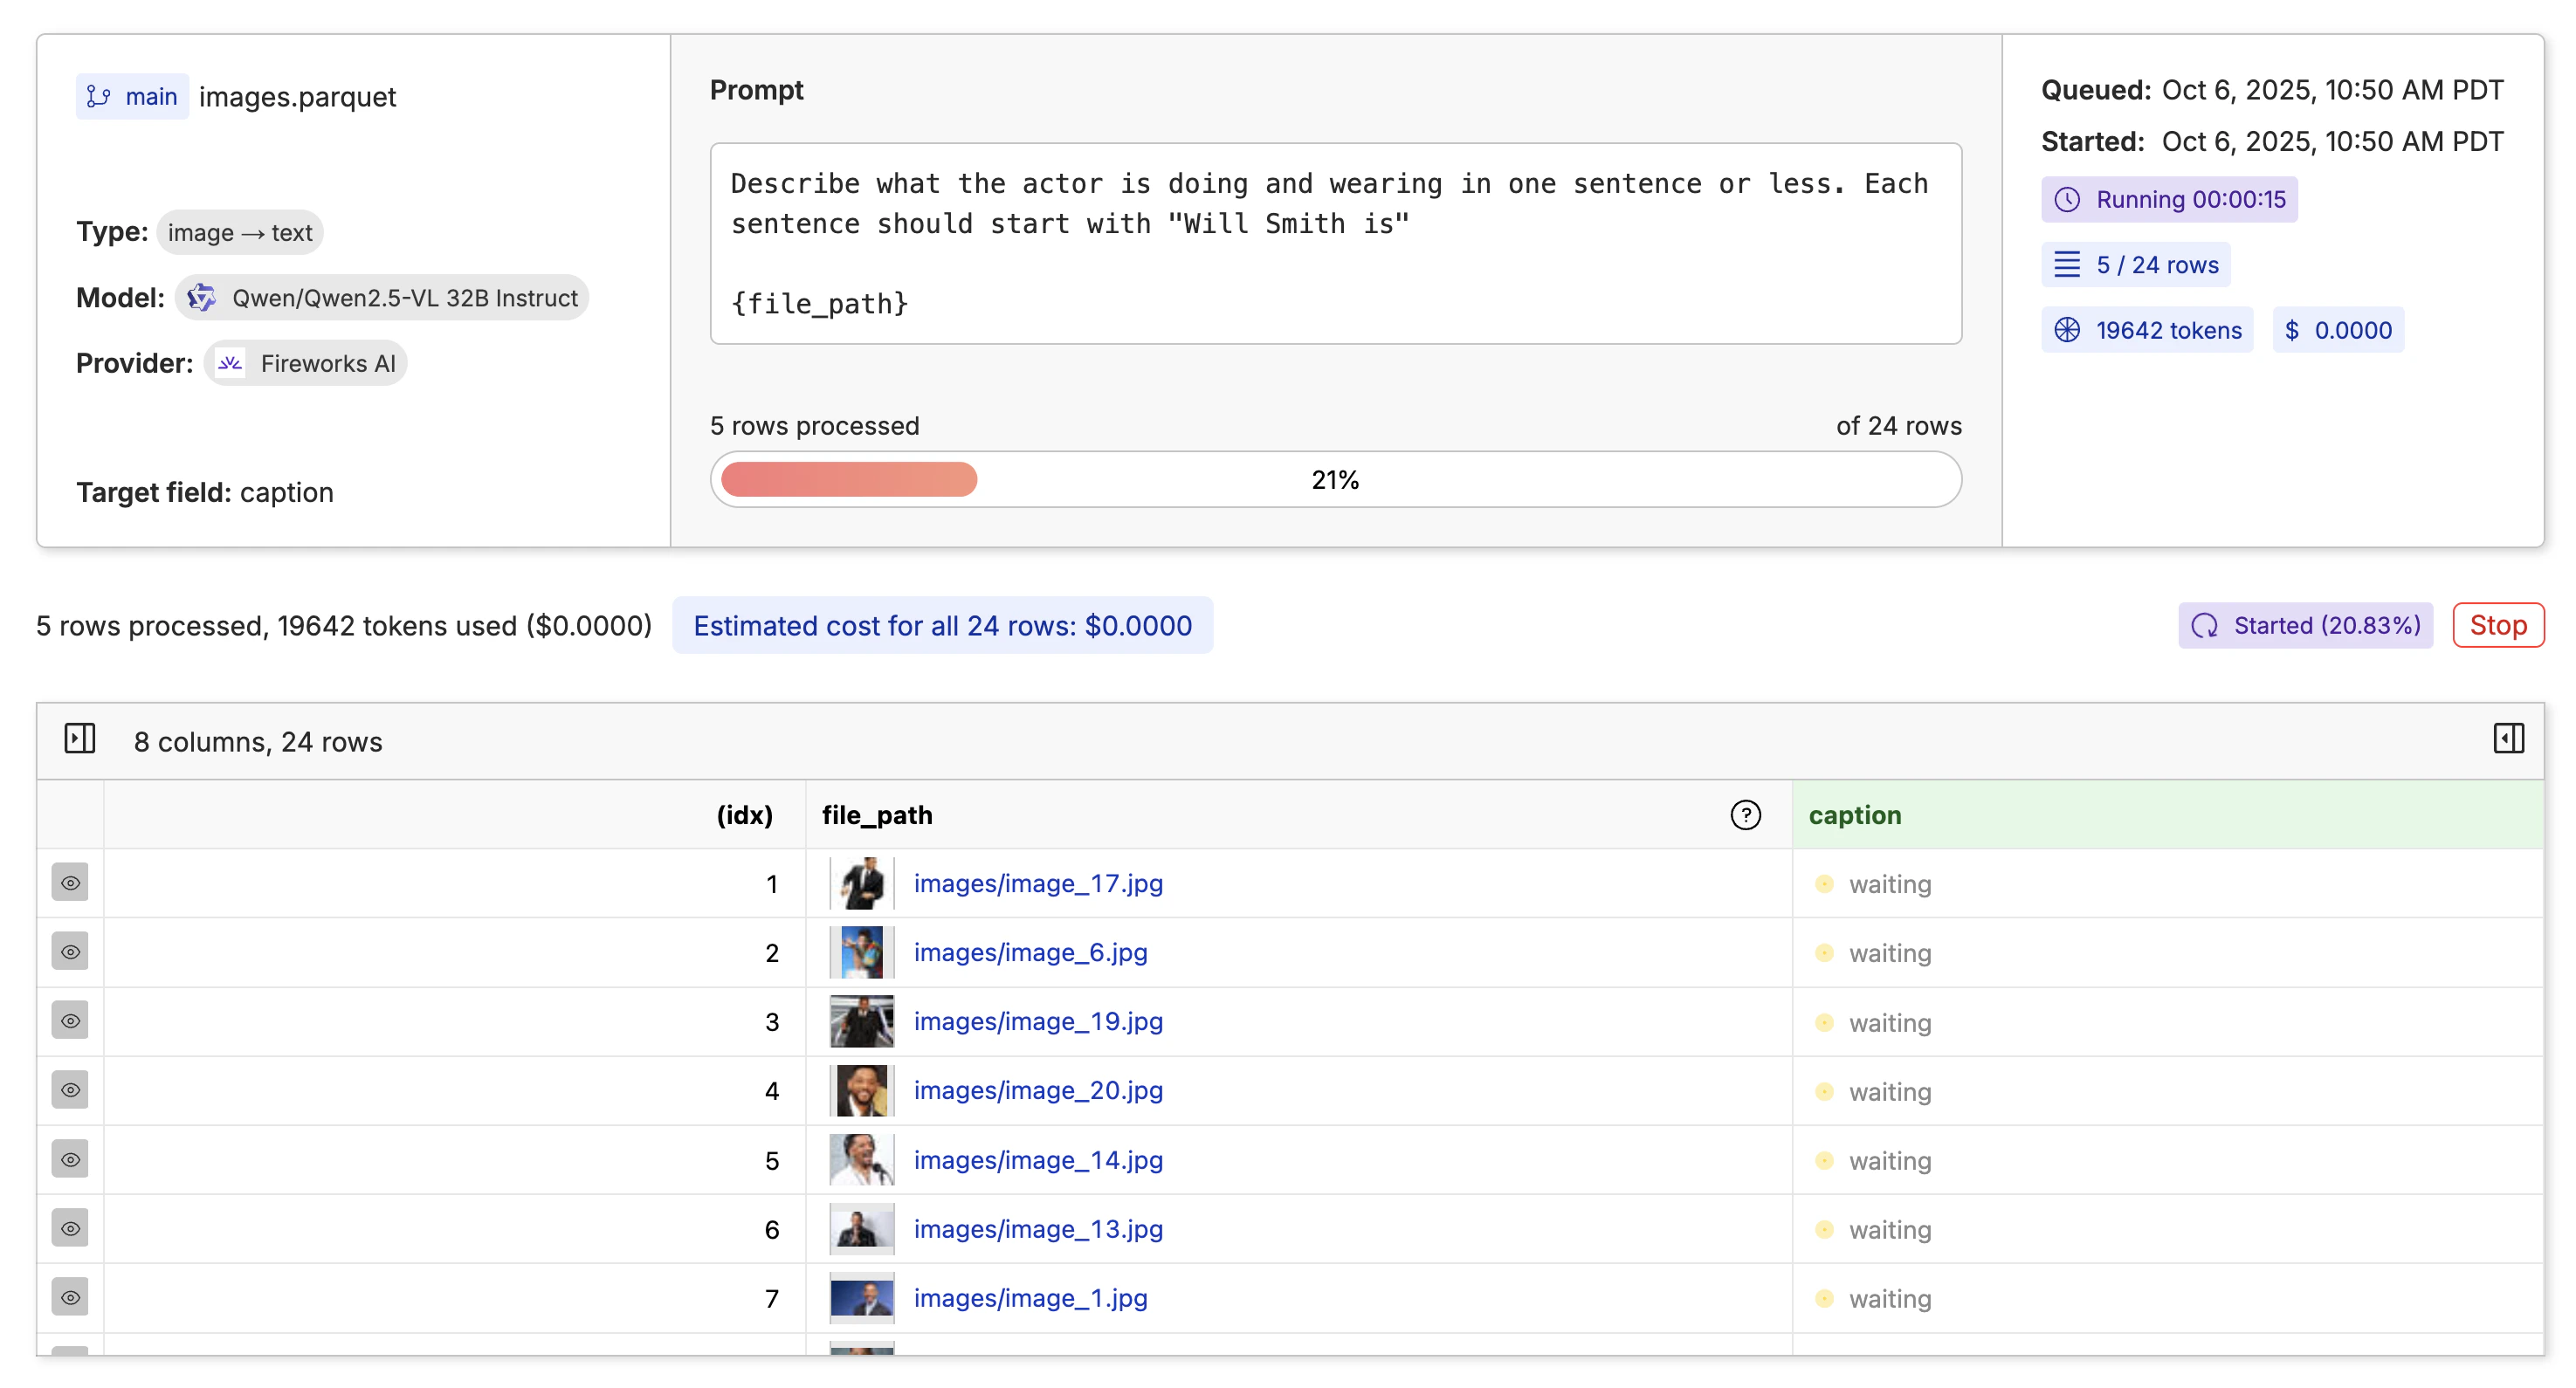
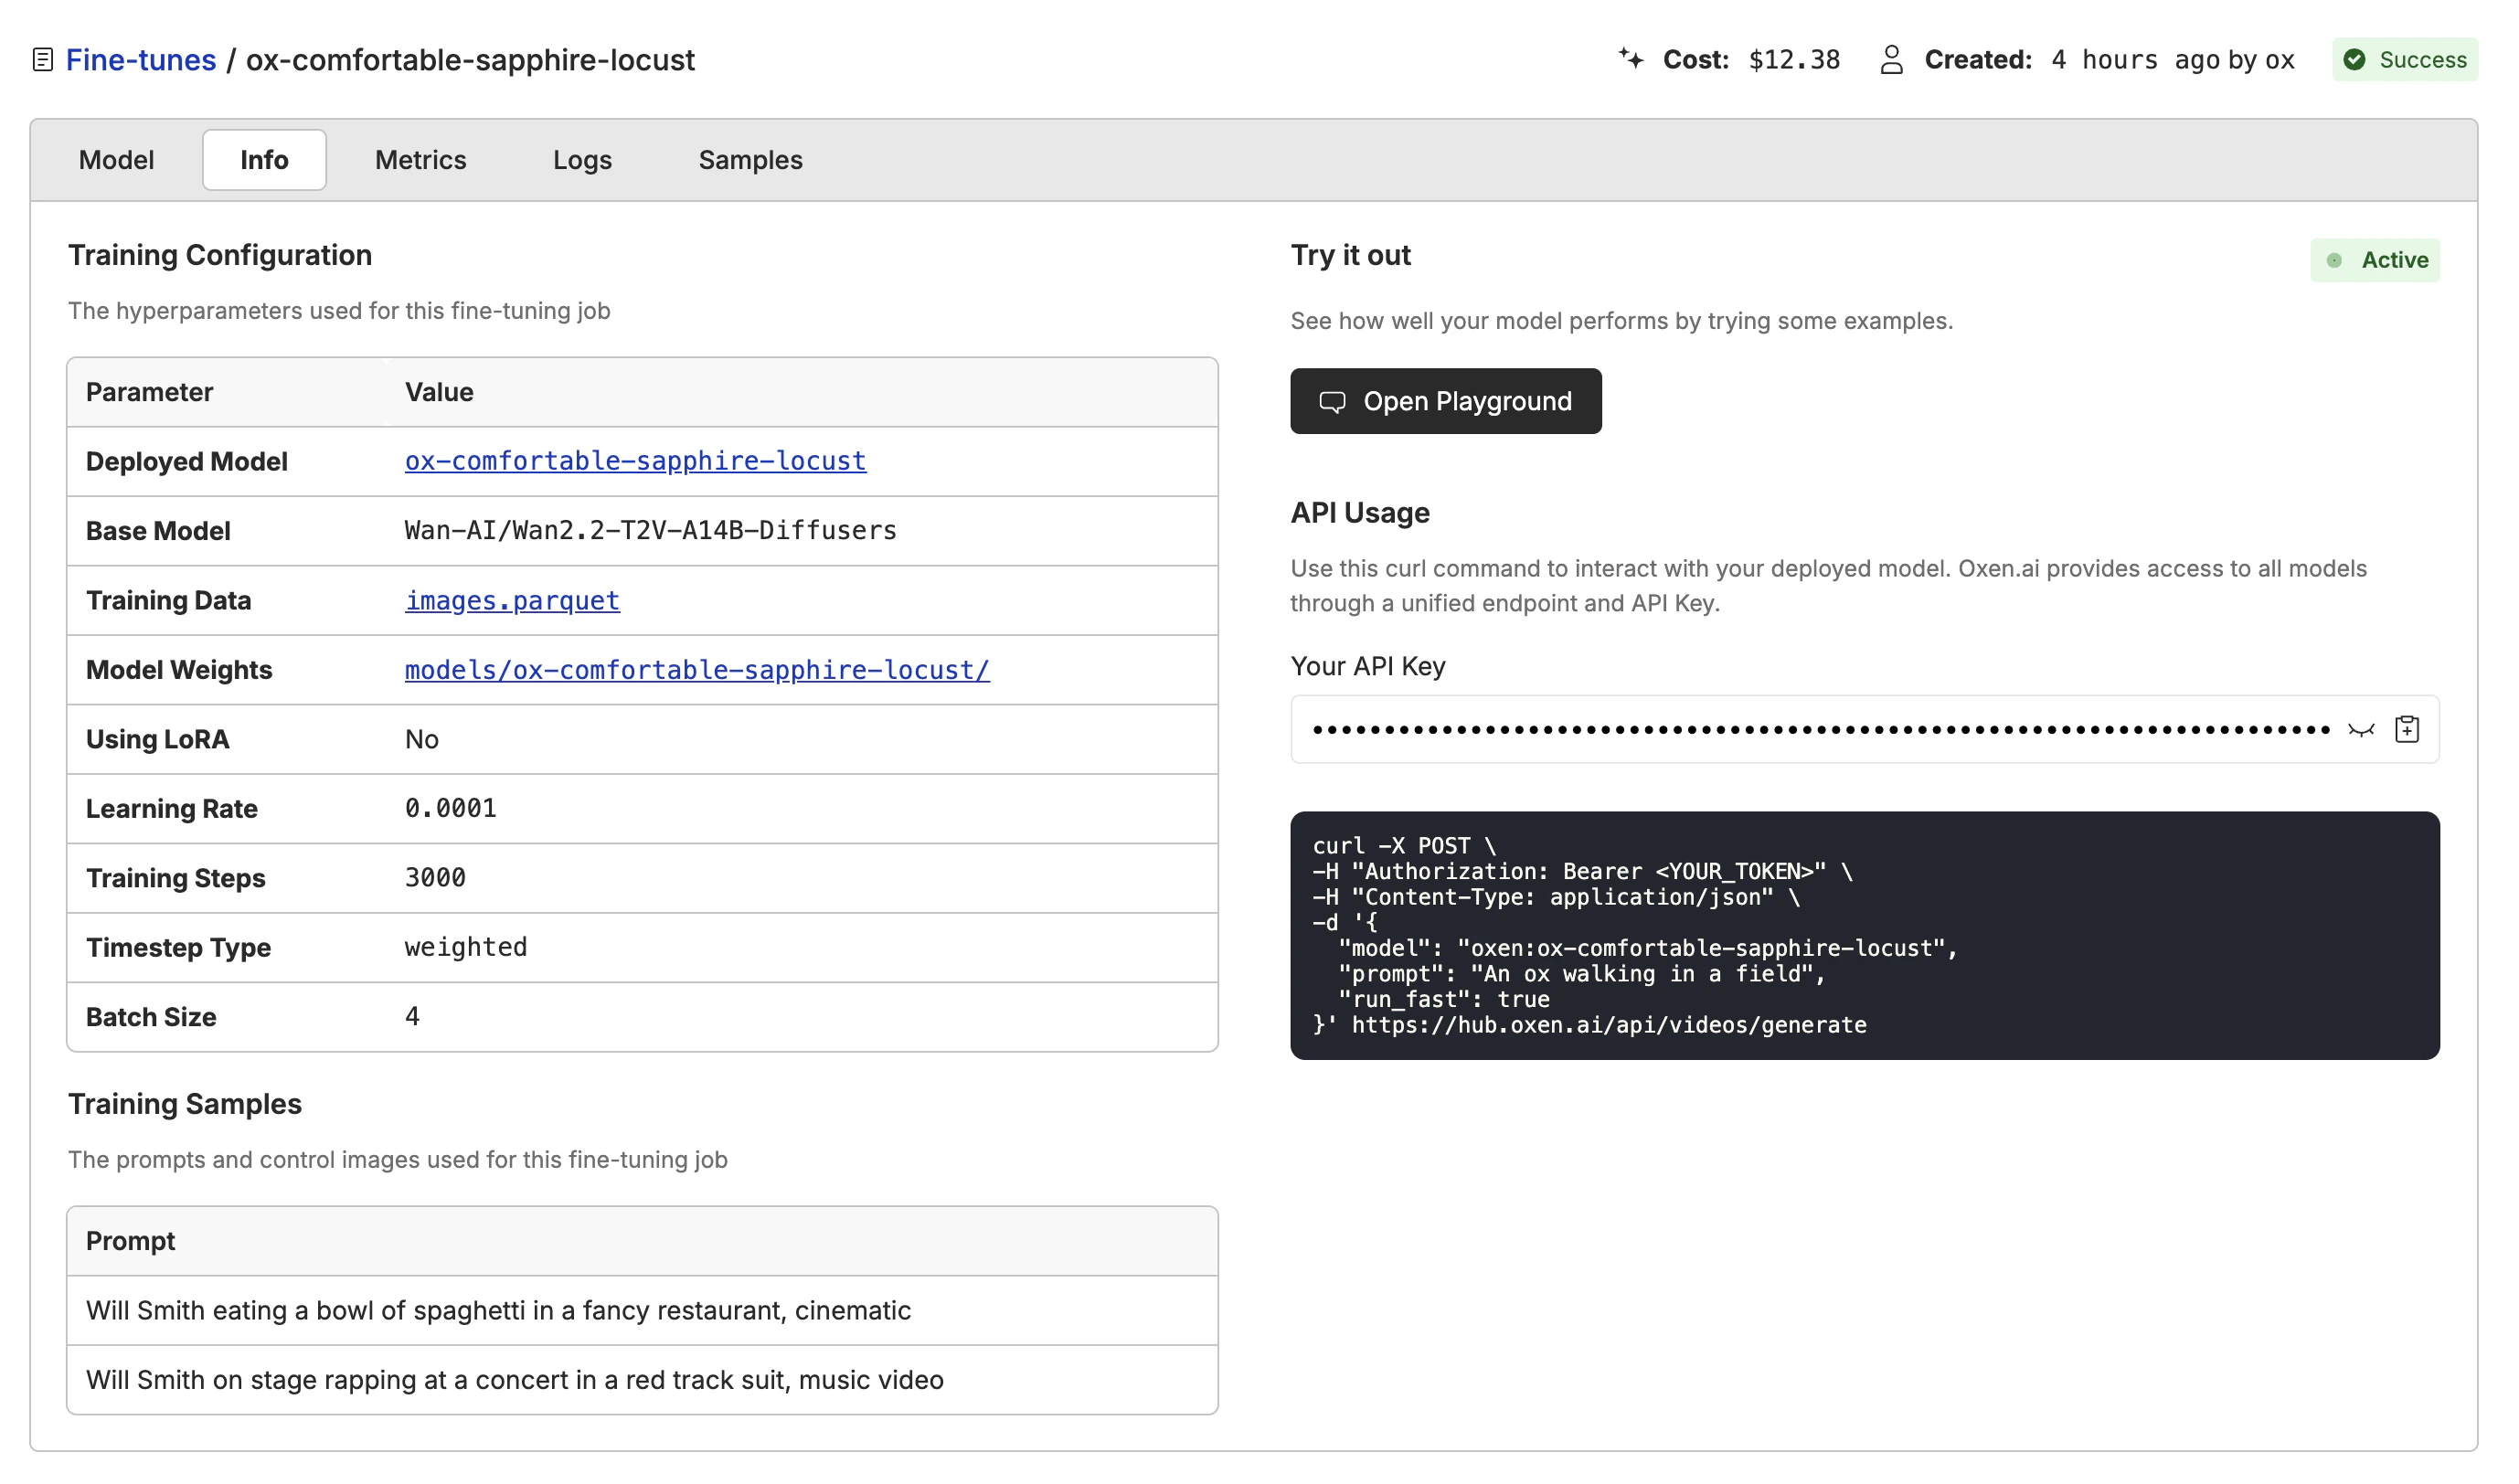
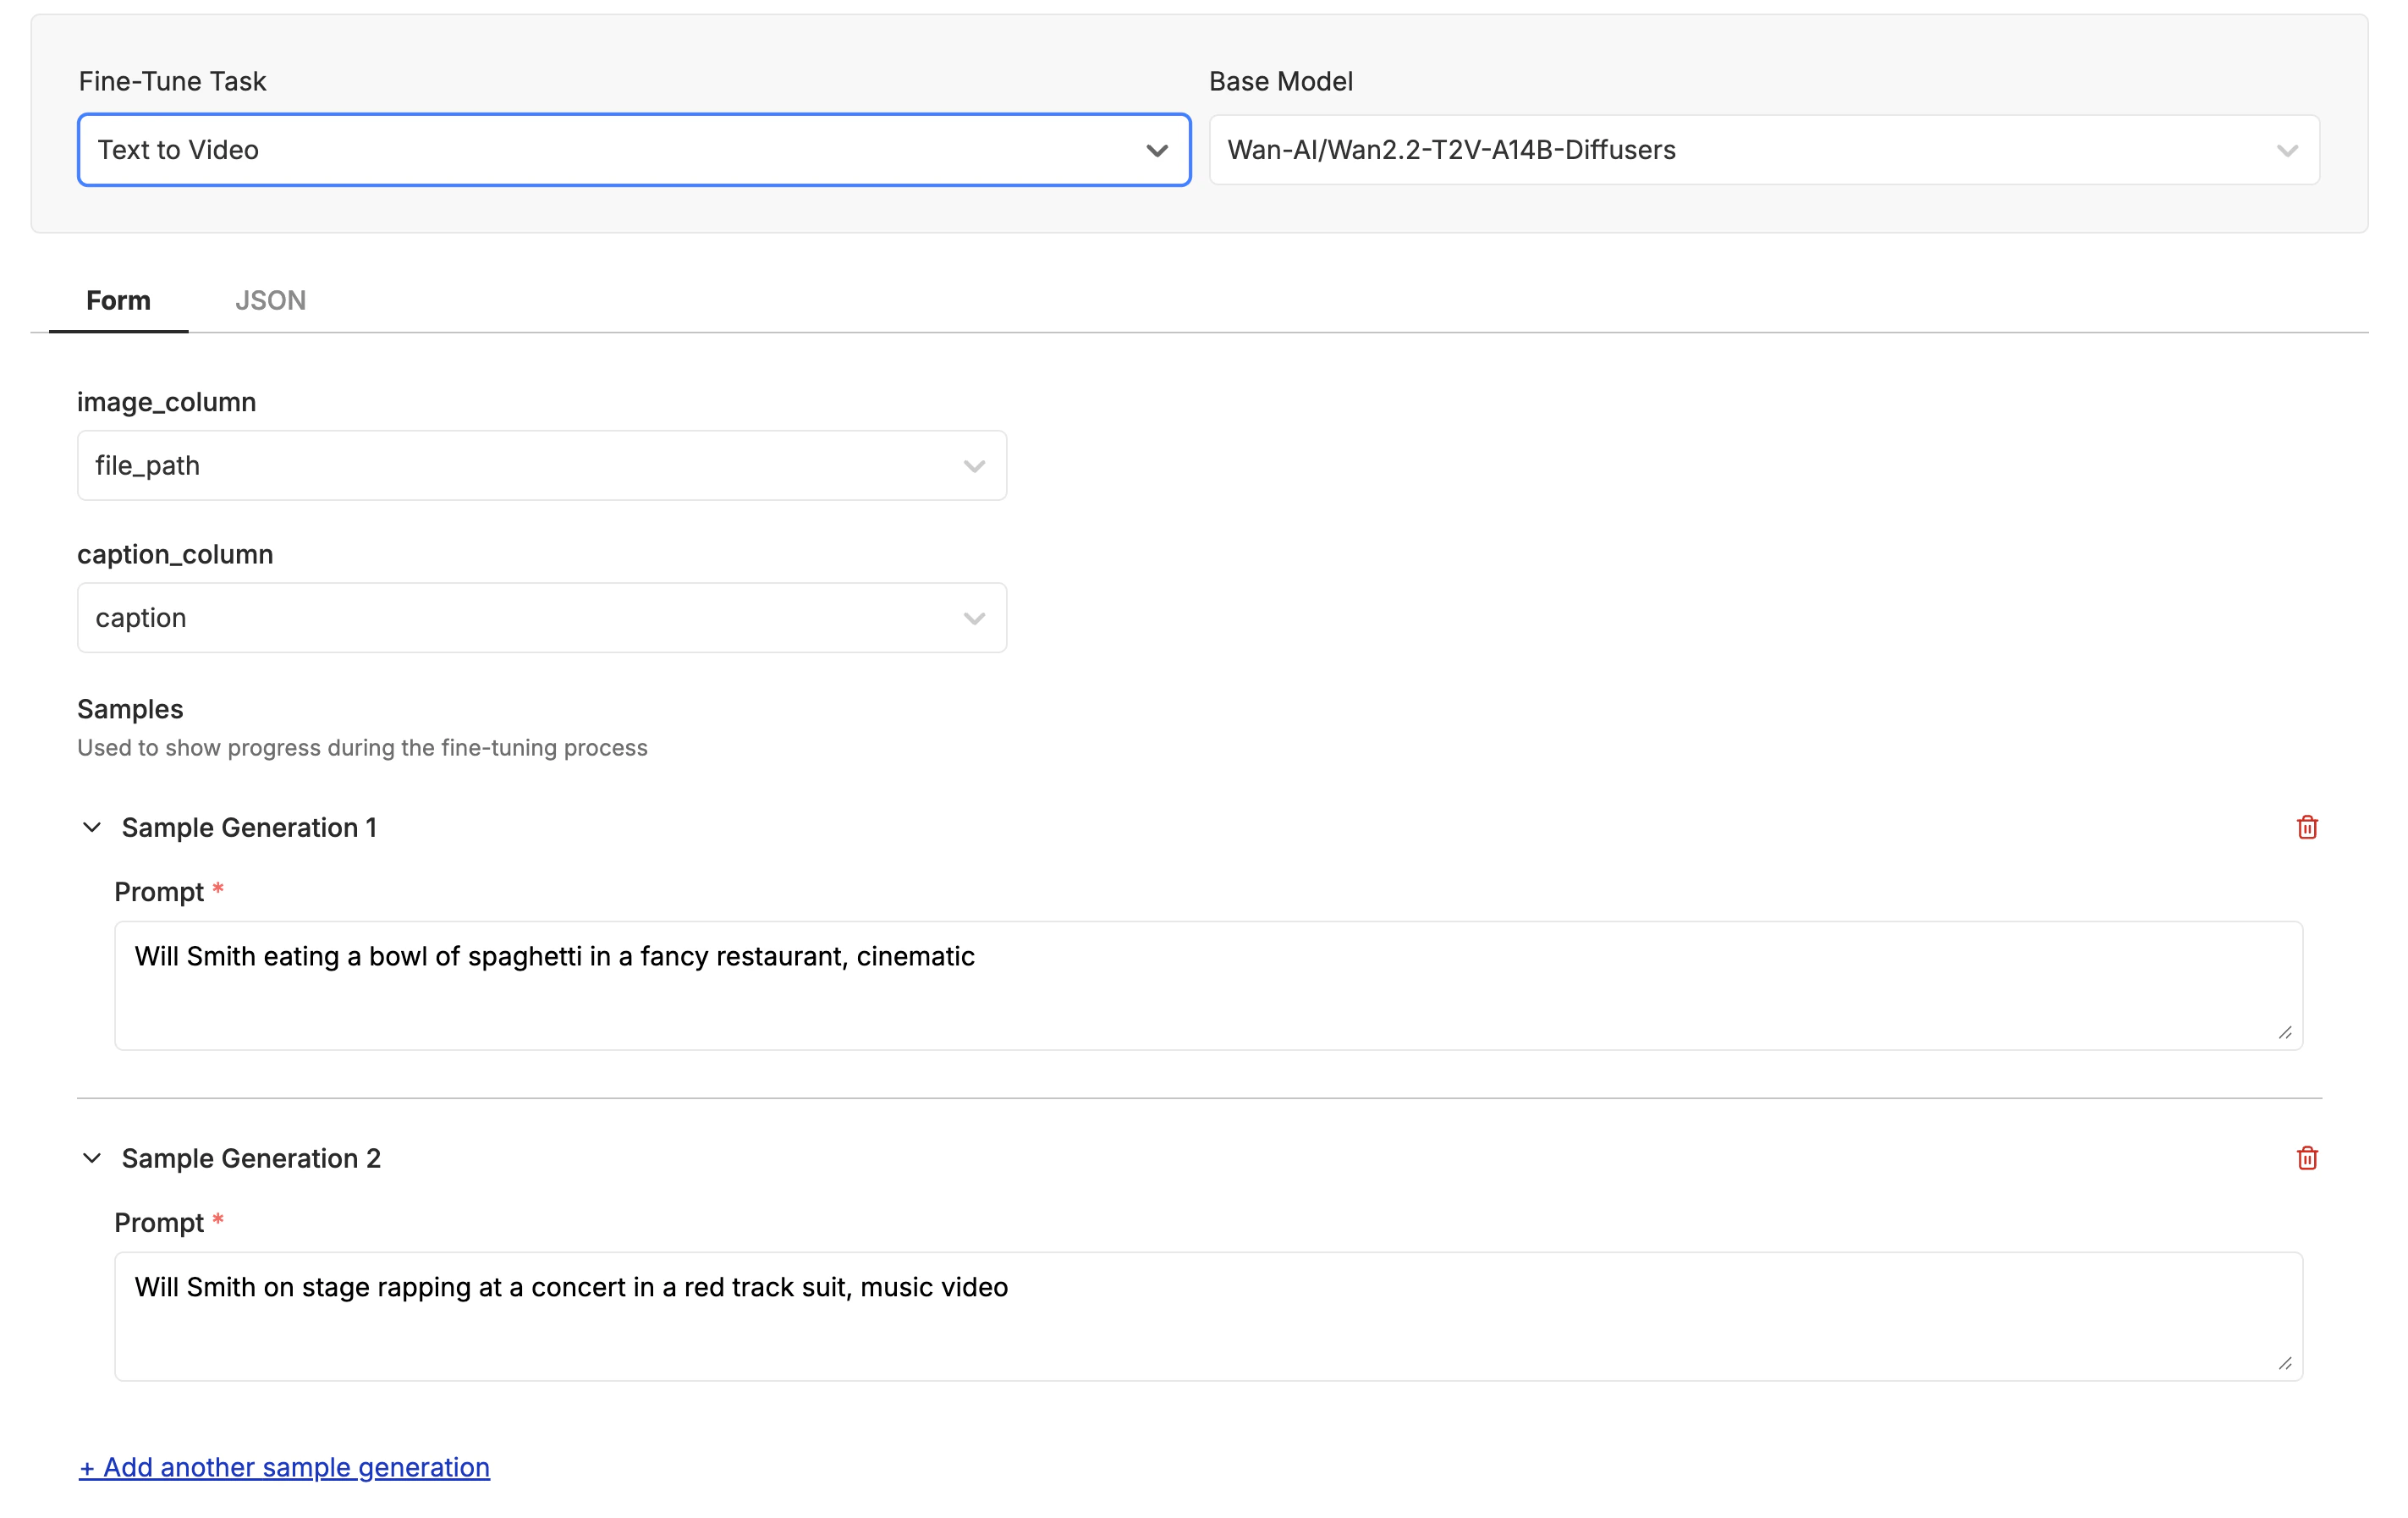
Kicking off the Fine-Tune
With your images labeled and you are happy with the quality and quantity, it is time to kick off your first fine-tune. Click the “Actions” button and select “Fine-Tune a Model”.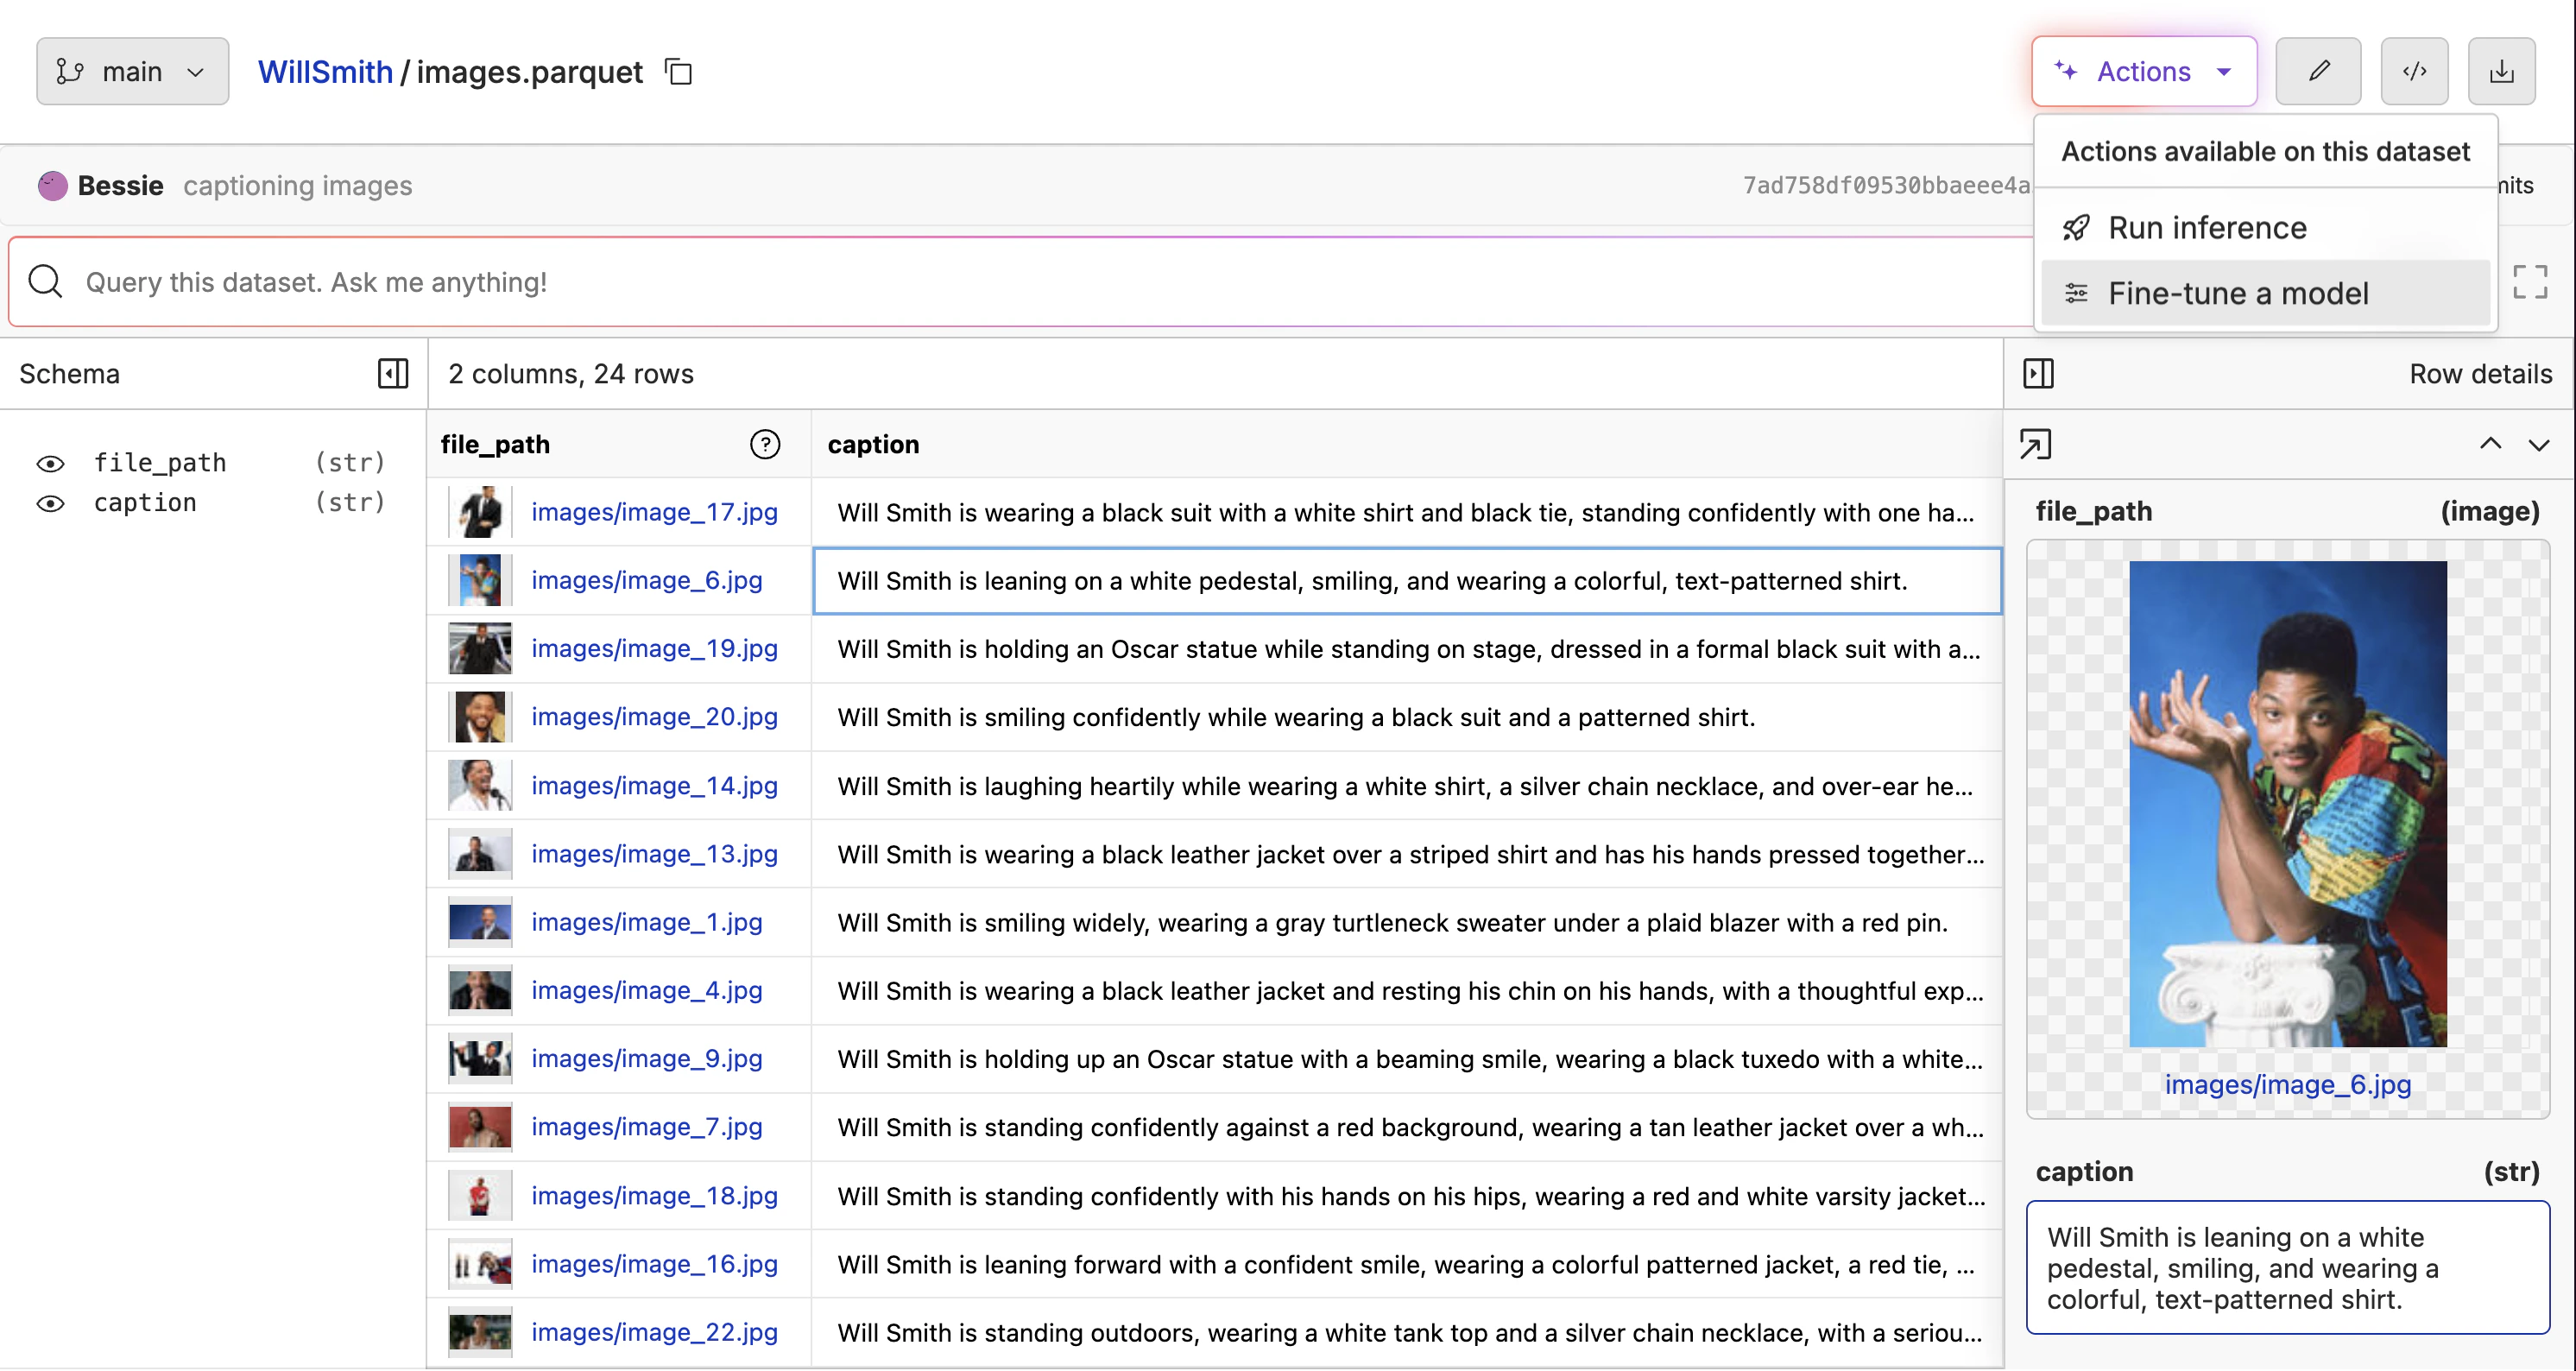
Video Generation. Then select the Wan-AI/Wan2.2-T2V-A14B-Diffusers model. Make sure the “Image” column is set to file_path column, and the “Prompt” column is set to caption column.
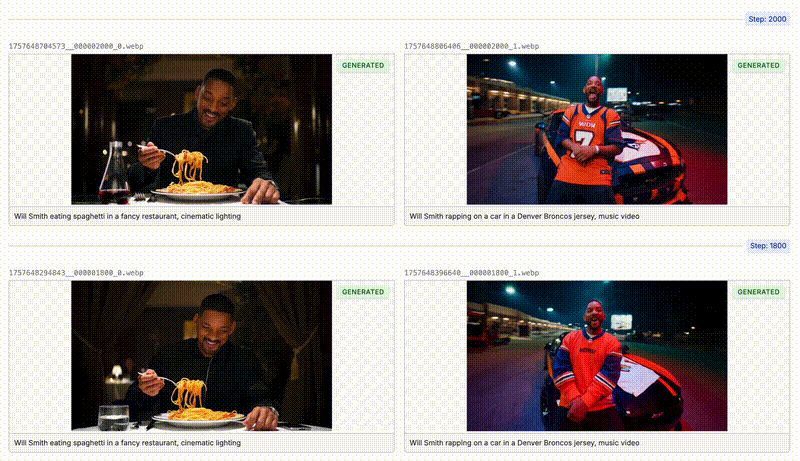
In the “Samples” section you can specify a few prompts that you want to test out as the model is training. This will help you get a feel for how the model is performing and make sure it is learning what you want.
Watching the Model Learn
As your model is training, Oxen will automatically sample videos that you specified in the “Samples” section in the previous step. You can see that the model is starting to learn the actor’s face and expression after a couple hundred steps.Deploying the Model
When the model has finished training, you can deploy it to a new model by clicking the “Deploy Model” button. The deployment will take a few minutes to complete.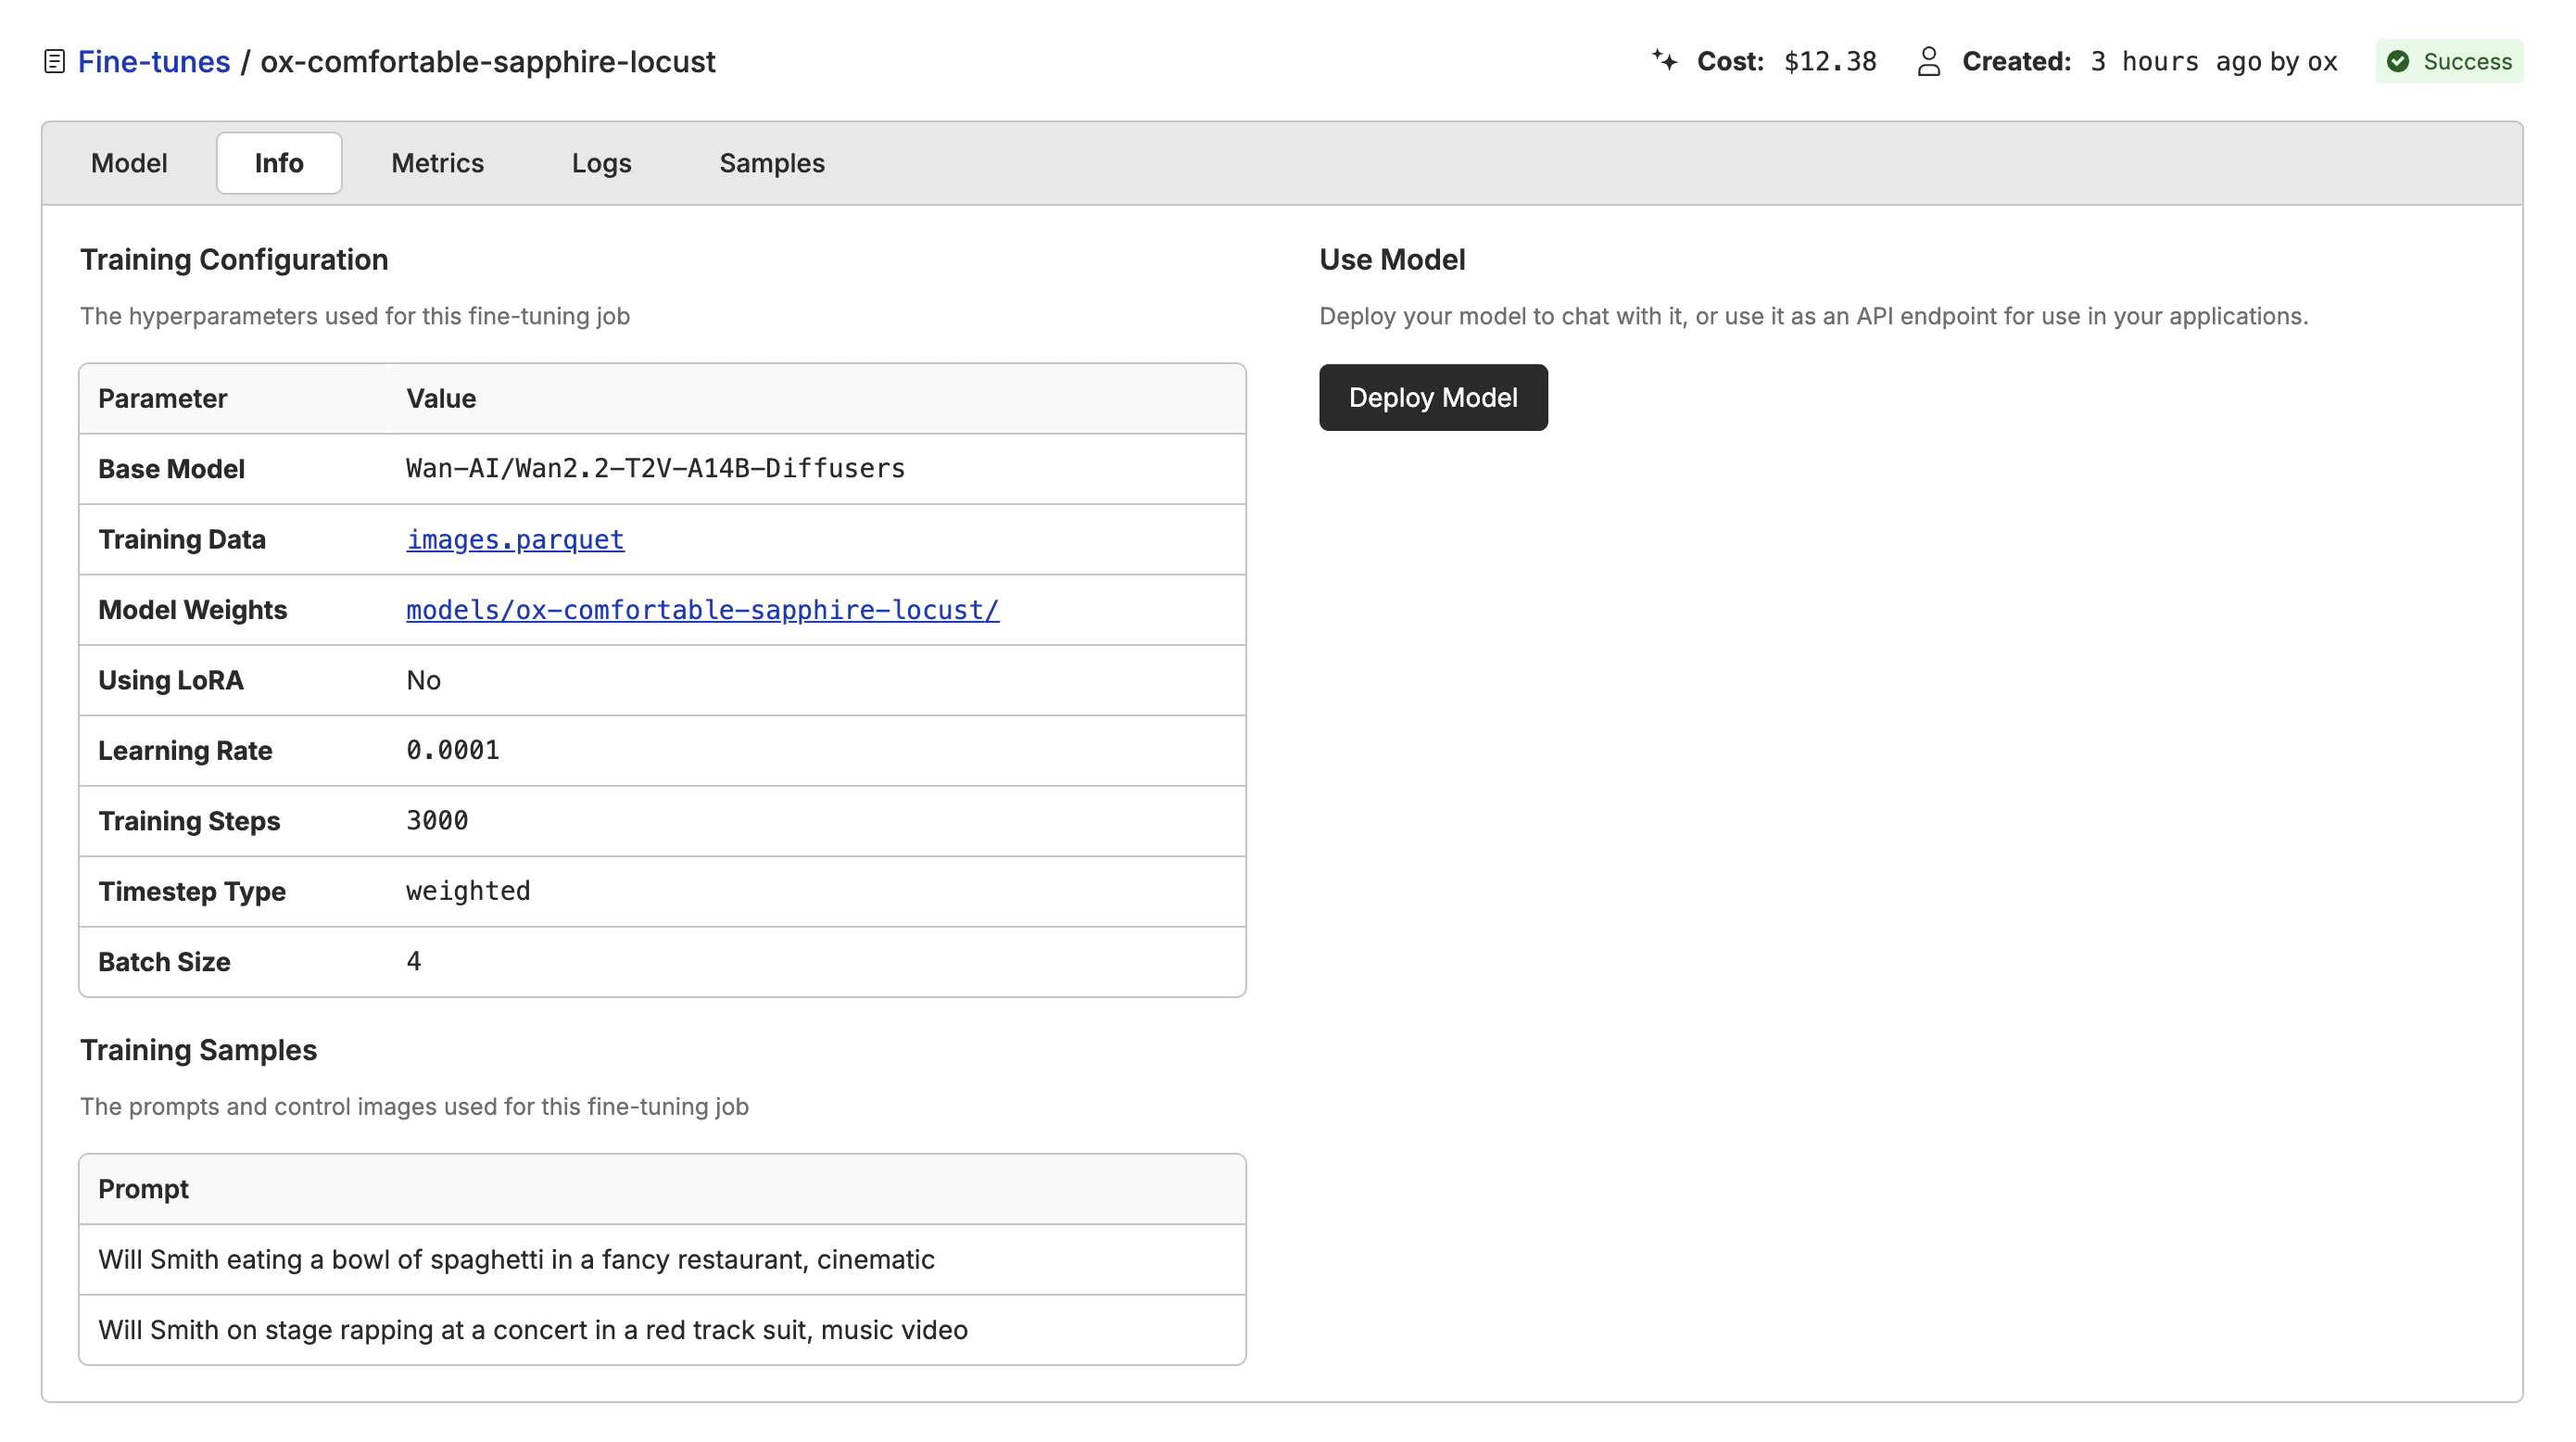
model name with the name of your deployed model.
Using the Playground
Click the “Open Playground” button to use the model in the playground. This allows you to prompt the model with different images and prompts to see how it performs.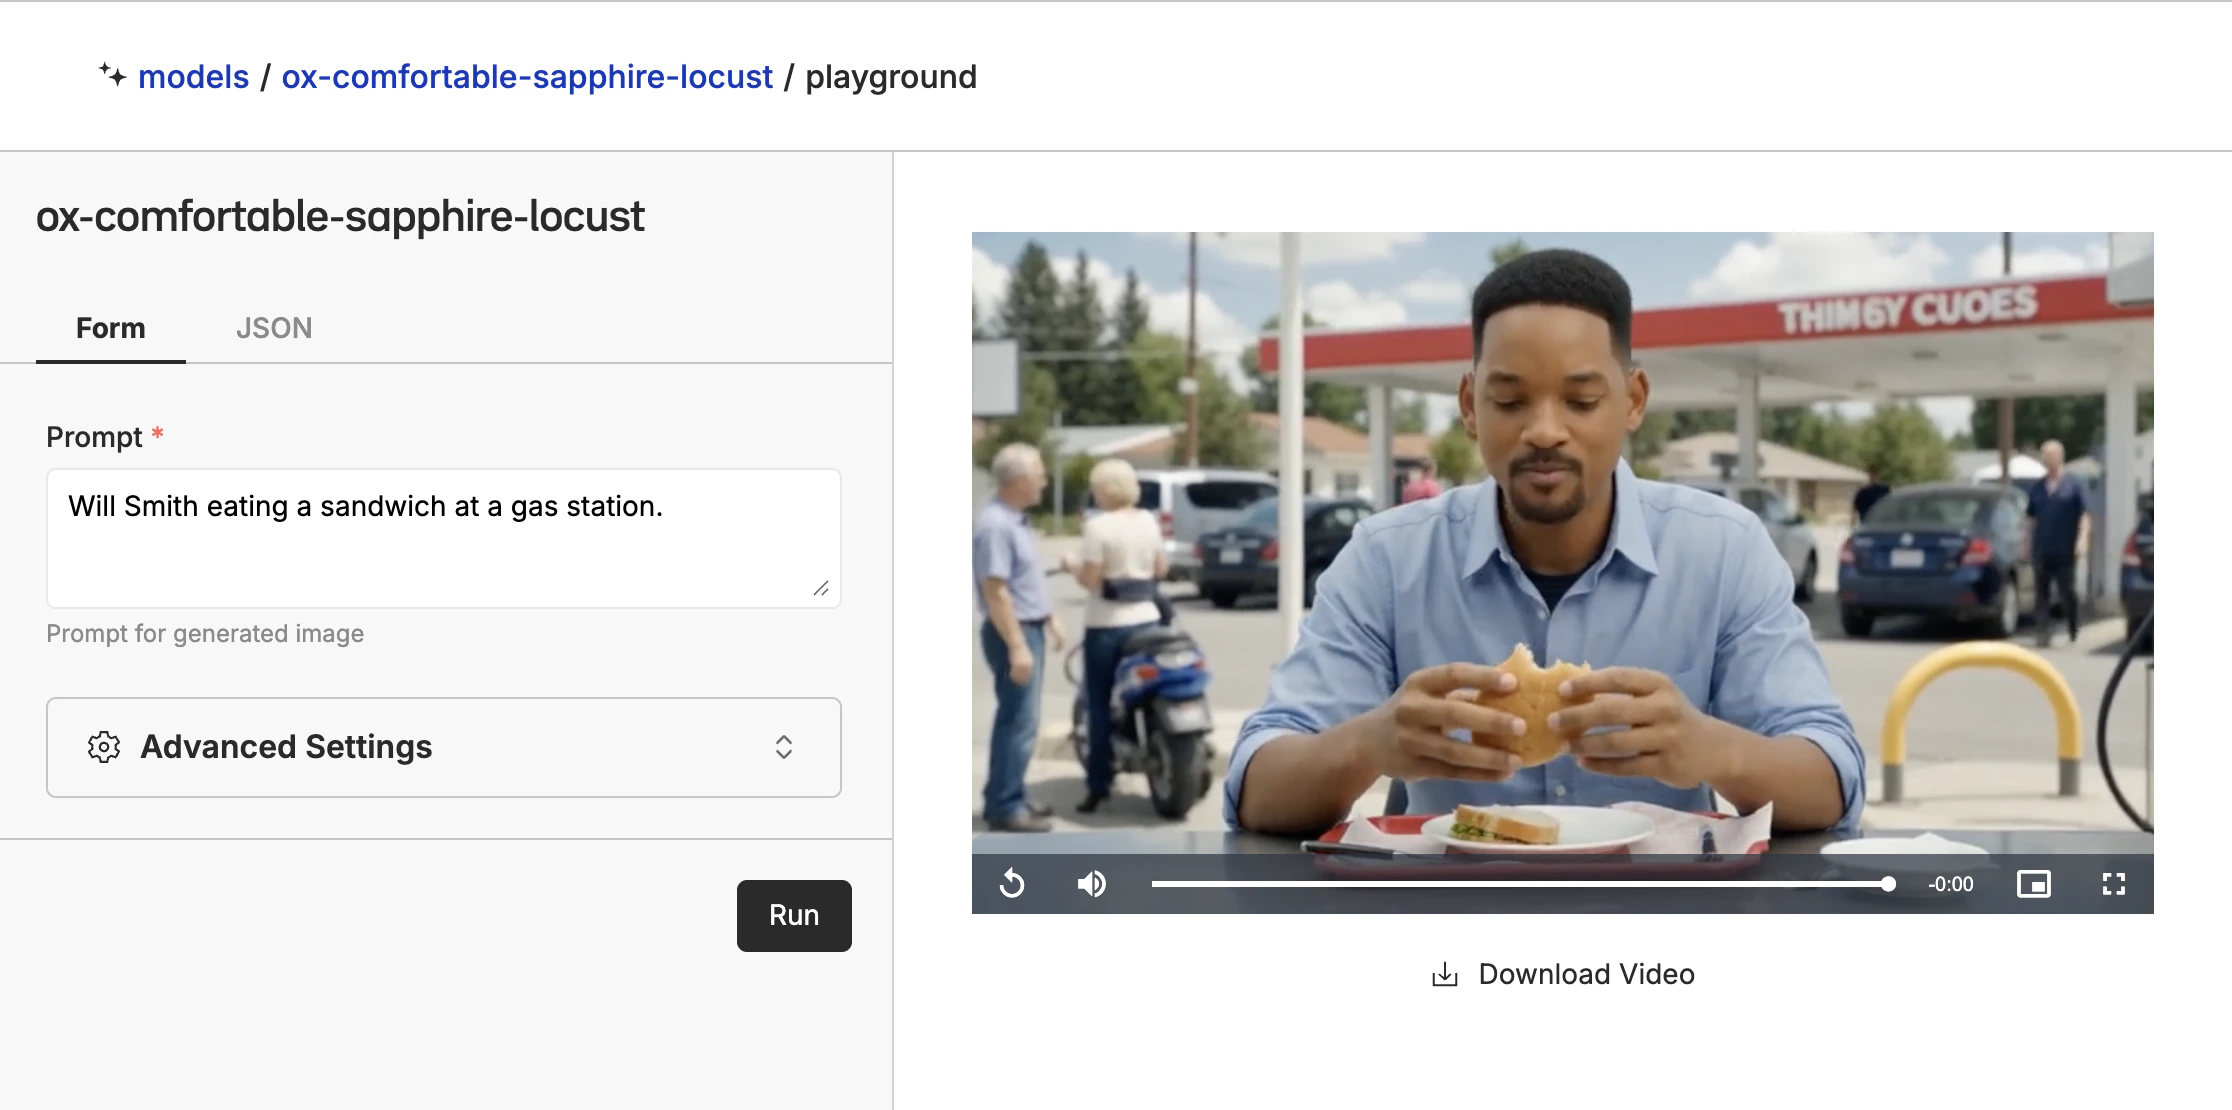
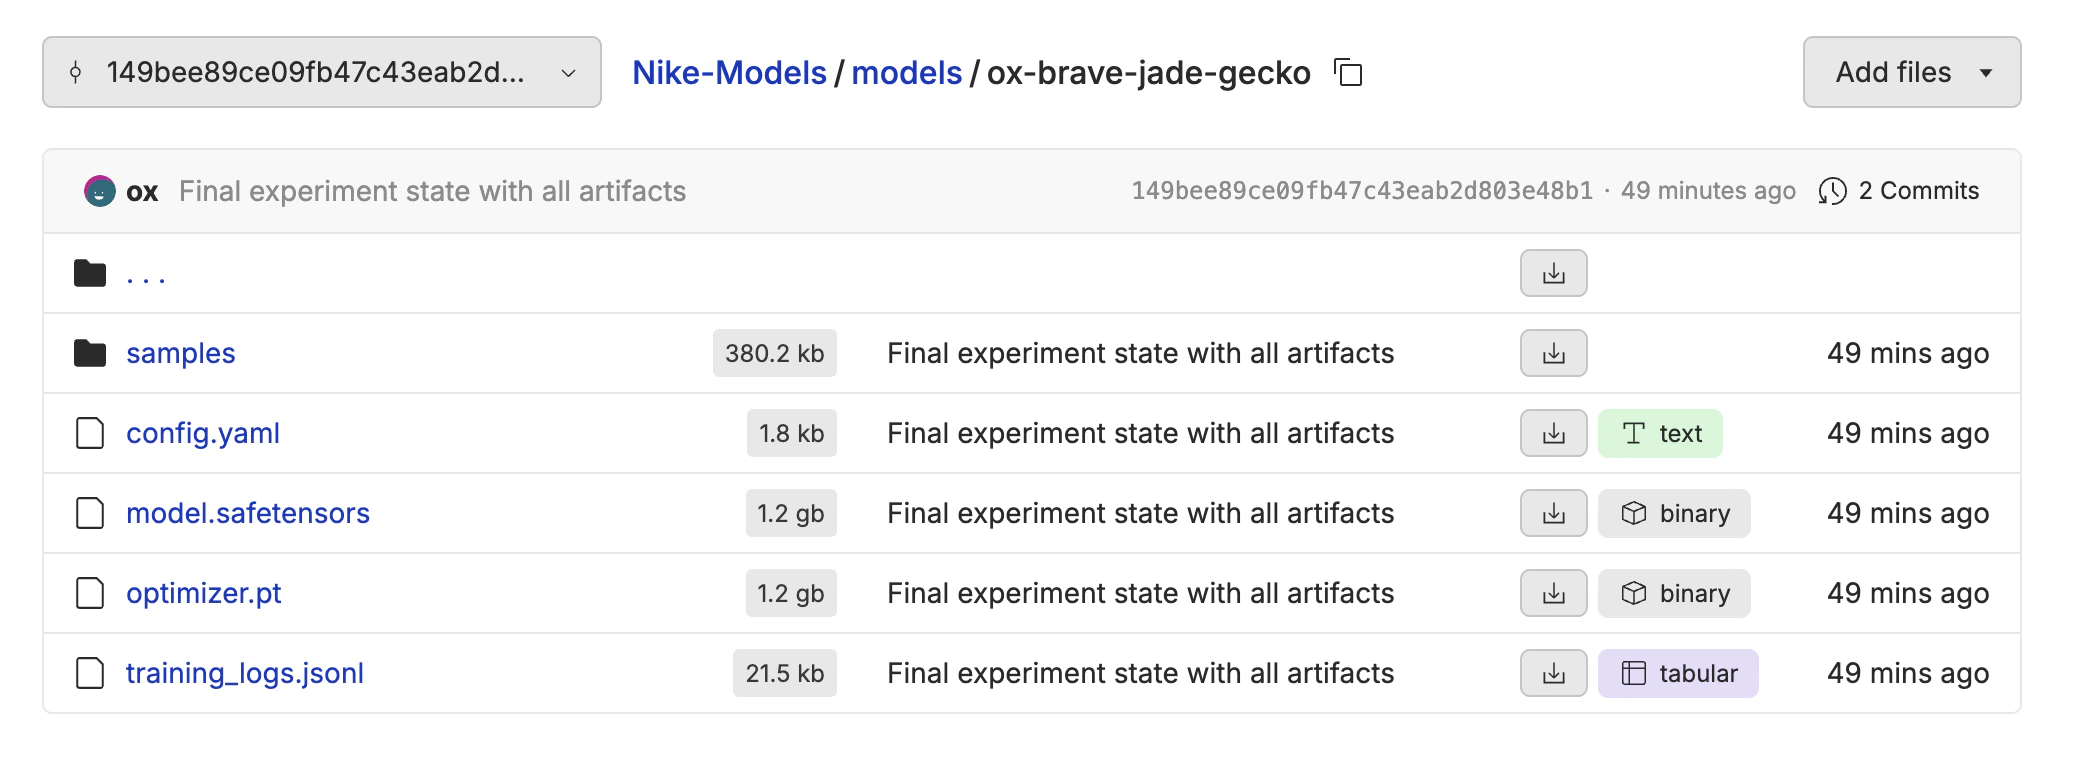
Exporting the Model
All of the model weights are stored back in your repository when the fine-tune is complete. Navigate to the fine-tune info tab, and you will see a link to the model weights. This is helpful if you want to download the weights to run in ComfyUI or your own infrastructure.